
Configuring PowerConnect Splunk Connection in SAP (PowerConnect ABAP 6.X)
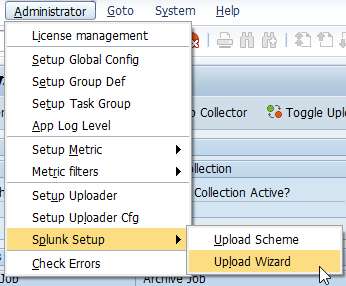
Once a valid license for PowerConnect is applied, a setup wizard will open to add configuration for a Splunk instance that will receive the data from the ABAP agent. If you plan to create an encrypted connection, based on SSL, please interrupt the wizard at this point and configure the SSL connection in SAP. You can restart the wizard later by navigating to Administrator → Splunk Setup → Upload Wizard from the PowerConnect control panel
In the initial dialog please select “Splunk HEC.”
Splunk receives data from PowerConnect using an HTTP Event Collector (HEC); if one is not yet set up in Splunk, it must be configured using the Splunk Web interface. More information can be found in the official Splunk documentation.
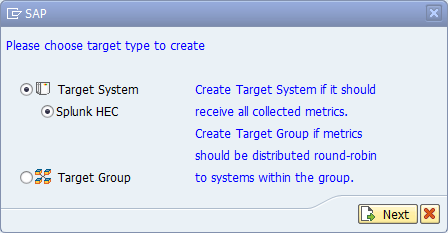
Click “Next.”
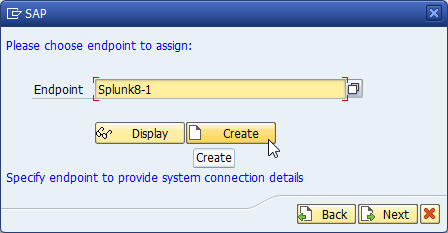
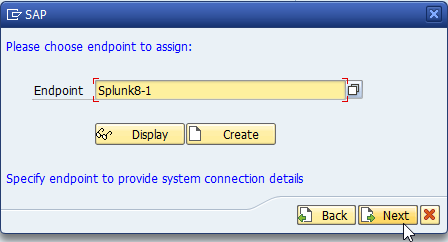
Enter a unique name for the endpoint and click “Create.”
PowerConnect allows you to configure multiple endpoints for different Splunk instances. A unique name is recommended to allow for ease of recognition.
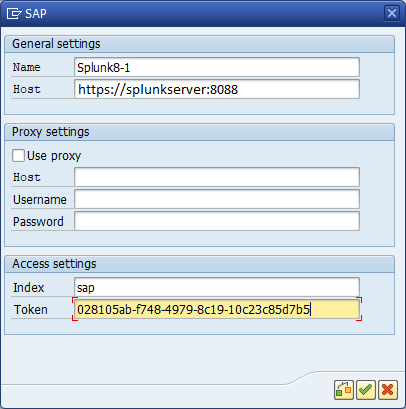
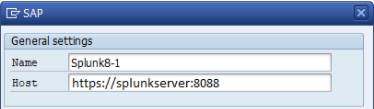
A new window will appear to configure the endpoint. Beside the connection name, please provide:
Hostname in http-format
In Splunk Enterprise, this will be the domain/address of the server with the following formatting: “[http/https]://<splunk_server>:8088”
The URI will be formatted http or https depending on whether SSL is configured. To learn more, see “Configure SSL in Splunk (Optional).”
Port 8088 is the default HTTP port for HEC inputs in Splunk Enterprise. If this has been customized for your implementation, use the custom port.
In Splunk Cloud, you can request the specific address for HEC inputs from Splunk support. The format may be similar to: “https://http-inputs-<customer_name>.splunkcloud.com:443/services/collector”
SSL is enabled by default.
Network Proxy settings (if applicable). This will be done if the internal network hosting your SAP system does not typically allow connections outside the network.
Check “Use Proxy” to activate
Provide the Host for the proxy server in a “<host_address>:<port>” format.
Fill in the Username and Password for the account.
The Splunk index you created for PowerConnect
HEC-Token
This is a character string that can be obtained from the HTTP Event Collector configured in Splunk for the PowerConnect app.
Test the connection by clicking on the leftmost button on the bottom-right corner of the configuration window.
Otherwise click on the green check to confirm the configuration.
Once the connection is confirmed, you will be returned to the wizard. Save the endpoint configuration by pressing “Next.”
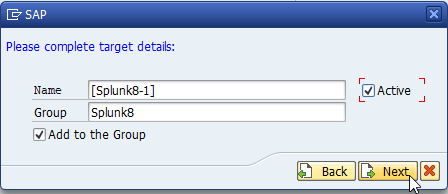
You now can assign the connection to a connection group. If there isn’t any, no action is required.
Set it to Active. PowerConnect will not transmit data using an inactive upload object.
Press Next.
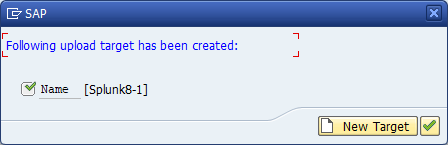
The connection is now configured. You can either create an additional endpoint or finish the wizard.
Notes for SSL Deployment
Please ensure you follow the guide Using SSL encryption between Splunk and SAP
The configuration in SAP for the host must either be
A fully qualified hostname, or
It must match the CN (Common Name) or the SAN (Subject Alternate Name) in the SSL certificate attached to the HEC port
This certificate can be different than the default port used for accessing Splunk Web (8000).
If you are not sure how SSL chain verification works, check with someone in your organization who manages SSL certificates.
If you see sslv3 errors in the SMICM log then check SAP note 510007 - Additional considerations for setting up SSL on Application Server ABAP and ensure your profile parameter ssl/client_ciphersuites is set to disable all SSL cipher suites except TLS 1.1 and higher.
This is a system wide change and impacts all SSL connects using TLS 1.0 or older, as Splunk does not allow them to be used any more. If SAP attempts to use an older cipher suite, Splunk will refuse the connection.
First Time Setup - Final Steps
Start background jobs
After configuring an initial connection, configure the user to start the background jobs. This is mandatory to run PowerConnect. There are three different types of job:
Check Job: Performs clean up activities and internal checks to ensure other jobs up and running.
Extractor Job: Extracts data from the different sources within the SAP system.
Uploader Job: Transmits the extracted data to Splunk.
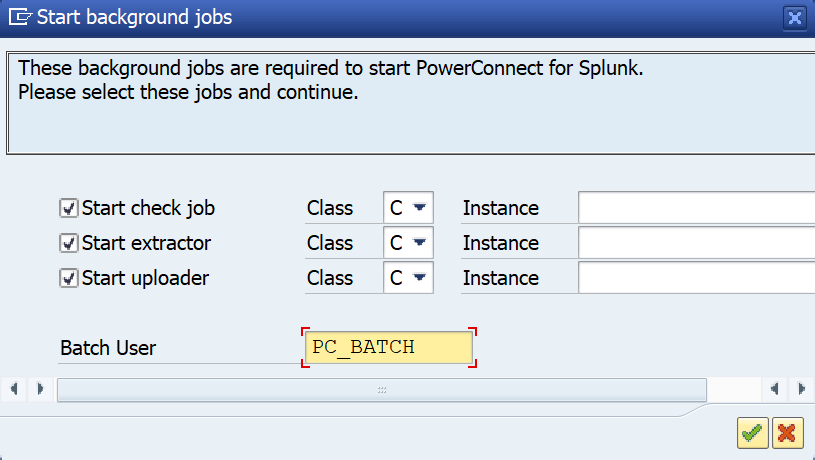
→ This step actually can be skipped easily. Jobs must be started manually from the control panel in program /BNWVS/MAIN then. Please refer to the Data Extraction User Guide to understand how the jobs can be started manually from the control panel.
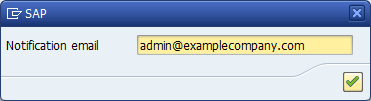
Set-up e-mail notification
The last prompt is regarding notification emails from PowerConnect.
Provide a valid e-mail address that gets the necessary attention needed for notification mails.
Press the green check.
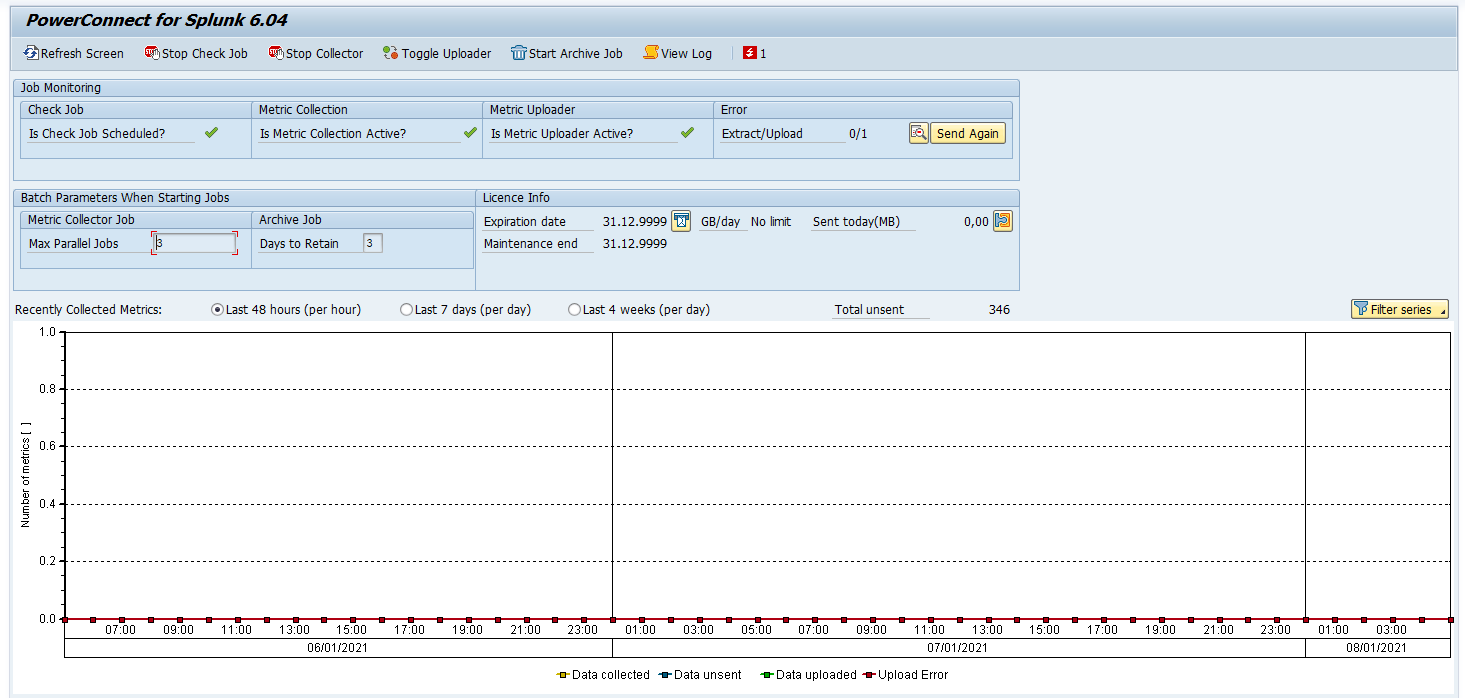
Basic configuration is finished. The batch jobs should begin automatically, collecting data and sending it to Splunk using the configured connection.
If you use SAP HANA as database it is necessary to apply certain database scripts as described here.