KB 109 (ABAP): Multi-Client Functionality
|
Category: Information |
Priority: Normal |
|---|---|
|
Platform: ABAP |
Version: 1 from 23.03.2021 |
Description
Extractors with Multi-Client Functionality
Though the PowerConnect ABAP agent installation process occurs in a non-technical client (technical clients include 000, 001, and 066), functionality exists to extract data from multiple clients. Below are the list of extractors that currently have the ability to extract data from multiple clients:
-
AL08
-
ATRA_STATE
-
BD87_DYN
-
CDPOS
-
NRIV
-
ROLE_AUTH
-
RSUSR003
-
RSUSR200
-
SCC4
-
SCOT
-
SLG1
-
SM04
-
SM19
-
SM20
-
SM21_LOG
-
SMQ1
-
SMQ2
-
SMQR
-
SOST
-
SRAL
-
ST01_STATE
-
ST03_RFCC
-
ST03_RFCS
-
ST03_USRW
-
ST03_WEBC
-
ST03_WEBS
-
ST22
-
STAD
-
STAD3
-
STMS_ROUTE
-
SU01
-
SU53
-
SWEQUEUE
-
SWI1_LOG
-
SXMB_MONI
-
TREAD_DYN
-
WE02
-
SUIM (SP 6.07+)
-
USH02 (SP 7.01+)
Configuration of Multi-Client Functionality
There are a subset of extractors, which require additional configuration to enable the multi-client functionality. The list of extractors which require additional configuration are:
-
SLG1
-
SMQ1
-
SMQ2
-
SU01
-
WE02
-
BD87_DYN
-
CDPOS
To complete the configuration, please follow the following steps:
-
Log into the client where the PowerConnect application is installed. Execute the /n/bnwvs/main transaction.
-
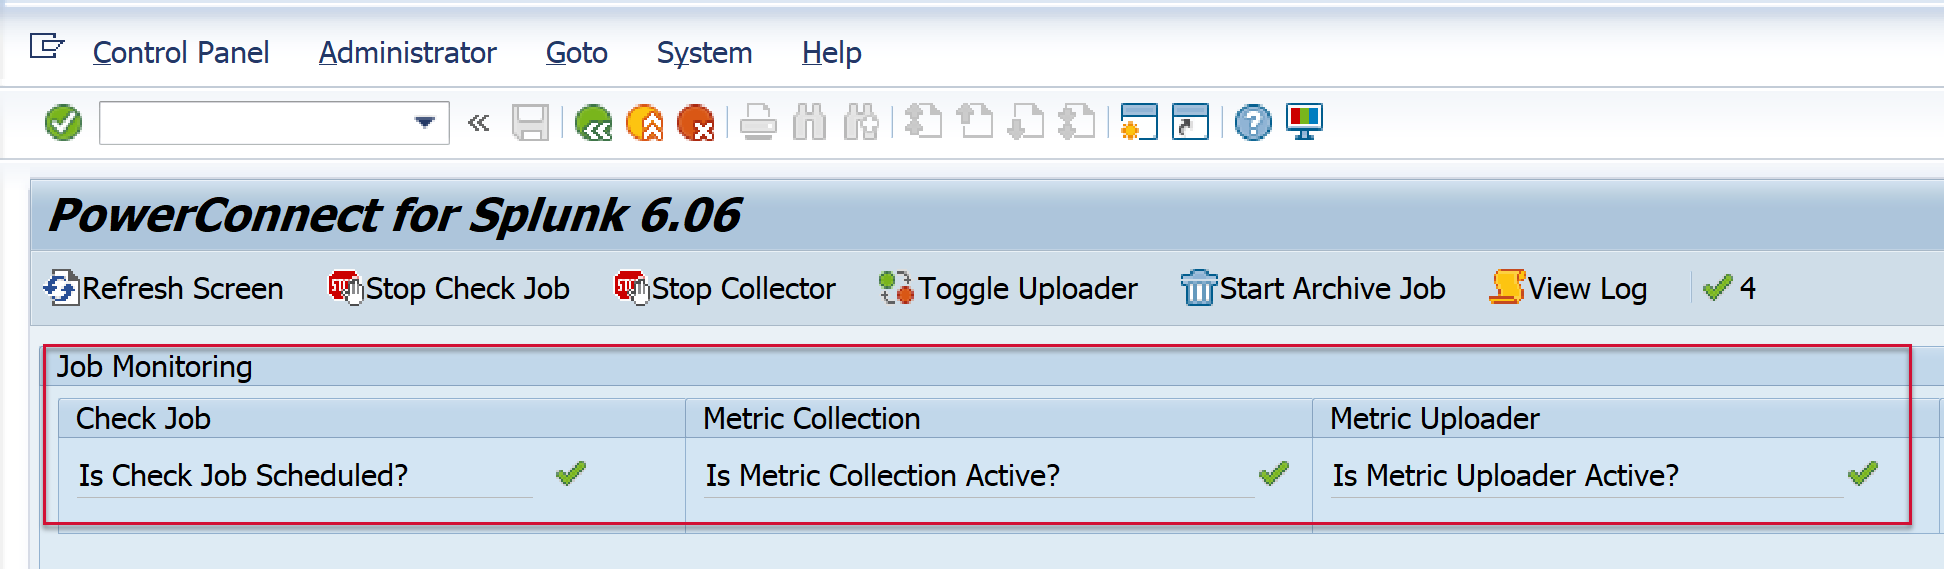
Stop the PowerConnect batch jobs using the buttons below:

-
Confirm that the PowerConnect batch jobs have stopped. The PowerConnect administrative console will look like this:

-
Go to Administrator → Setup Metric → Metric Configuration
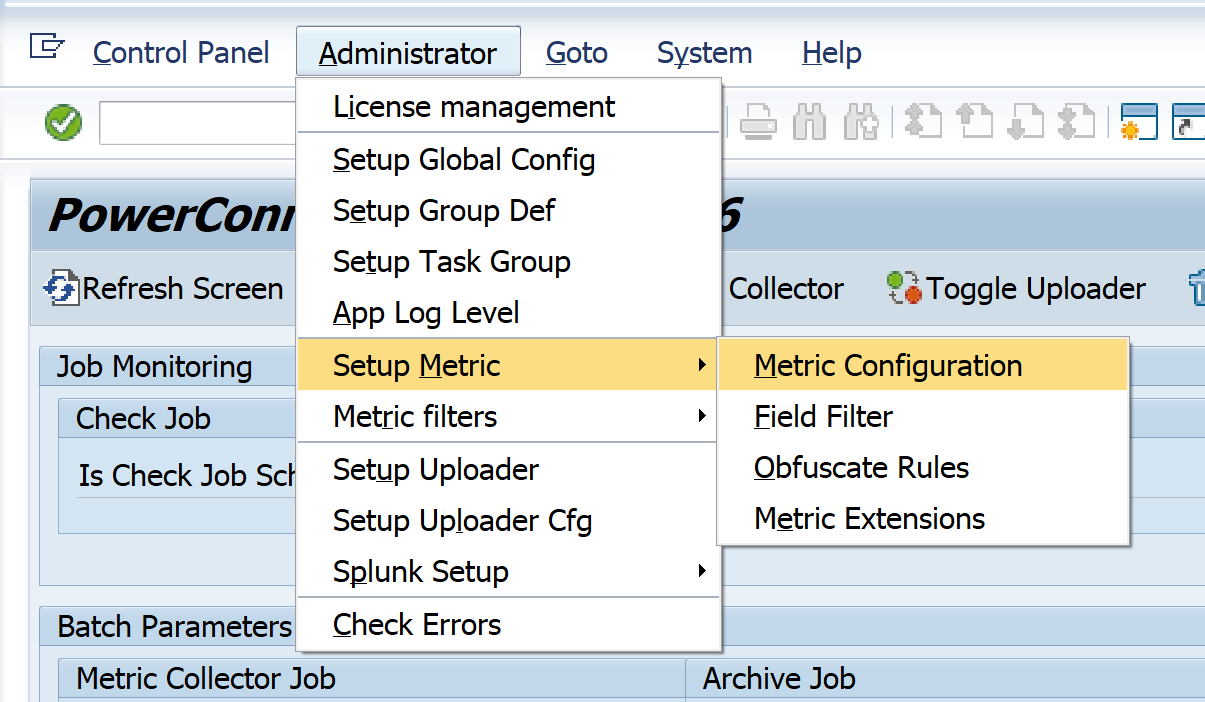
-
To enable multi-client extraction functionality, you will need to adjust the highlighted sections below based on the extractor you would like to adjust.

-
Adjust the highlighted sections below for the desired extractors by adding an “X” or a “*” value depending on the extractor. See below for how this should be configured for each extractor. Save.
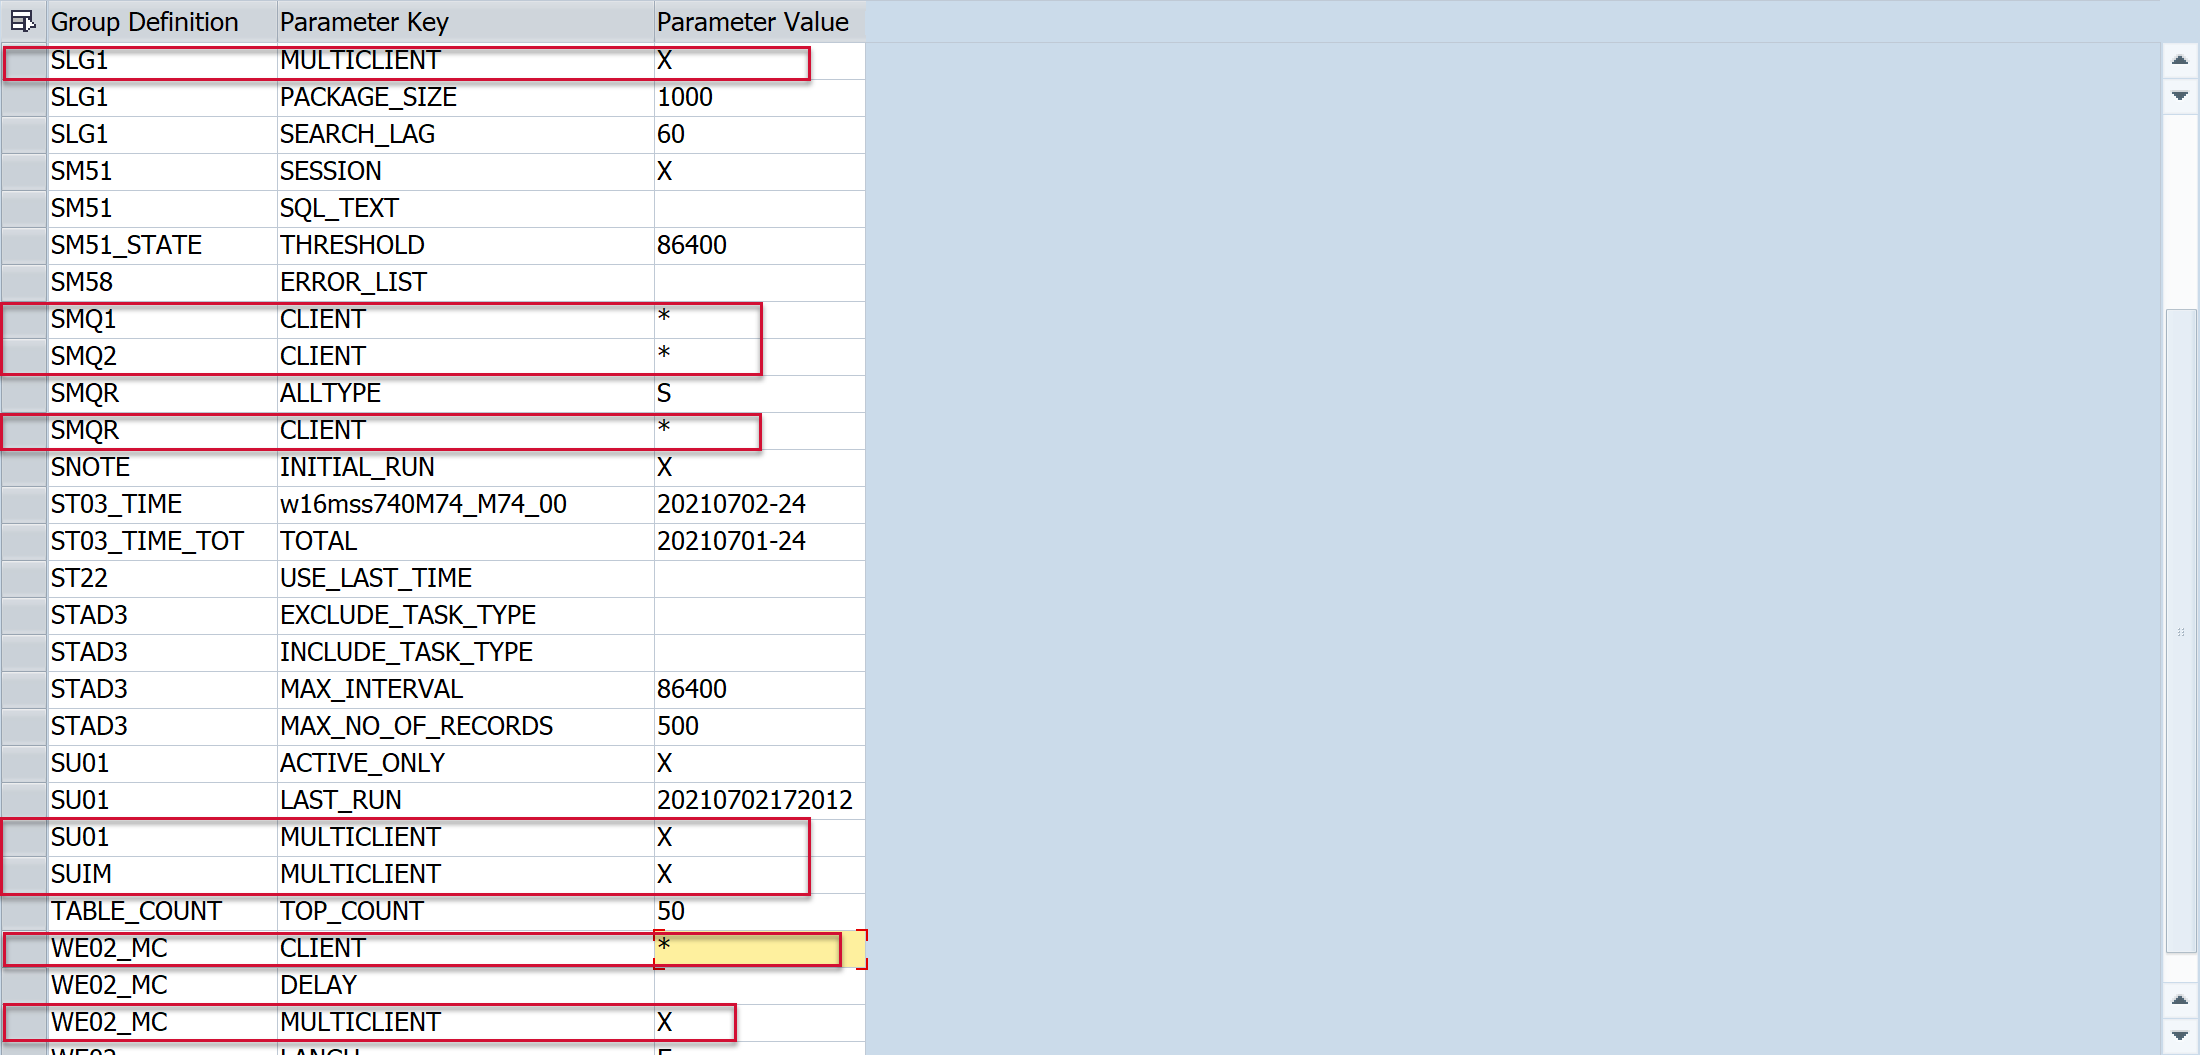
-
Go back to the PowerConnect administrative console, and then restart the PowerConnect batch jobs using the buttons below.

-
Confirm the batch jobs have started by validating that the check boxes display as green as seen in the screenshot below.