
KB 95 - Splunk – Create Self-signed SSL Certificate V2
KB 95 (Splunk): Splunk – Create Self-signed SSL Certificate V2
Category: Information
Platform: Splunk
Priority: Normal
Version: 1 from 23.03.2021
Description
The purpose of this document is to show the process to generate a self-signed SLL certificate for Splunk that matches the fully qualified domain name of the Splunk server. By default Splunk is delivered with a certificate called SplunkServerDefautCert – however for SAP to connect to Splunk the certificate much match the hostname of the server. Please follow the steps below for additional information on how to create the Self-signed SSL certificate.
Verify the Current Certificate Name
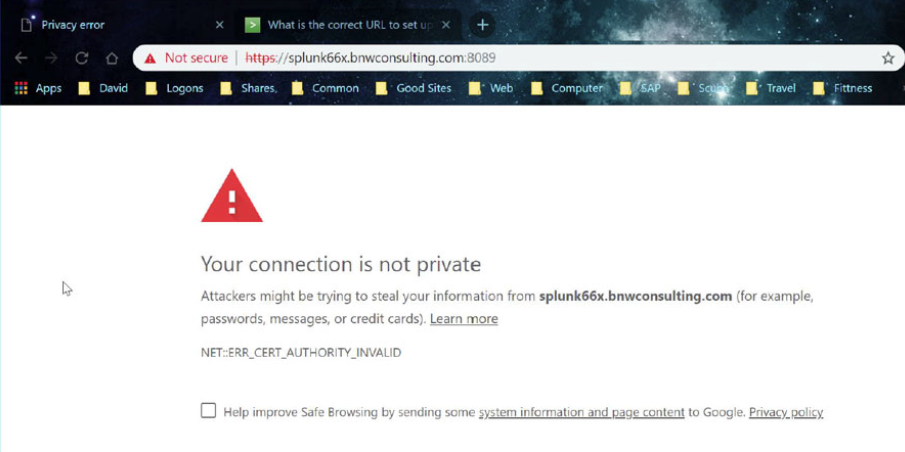
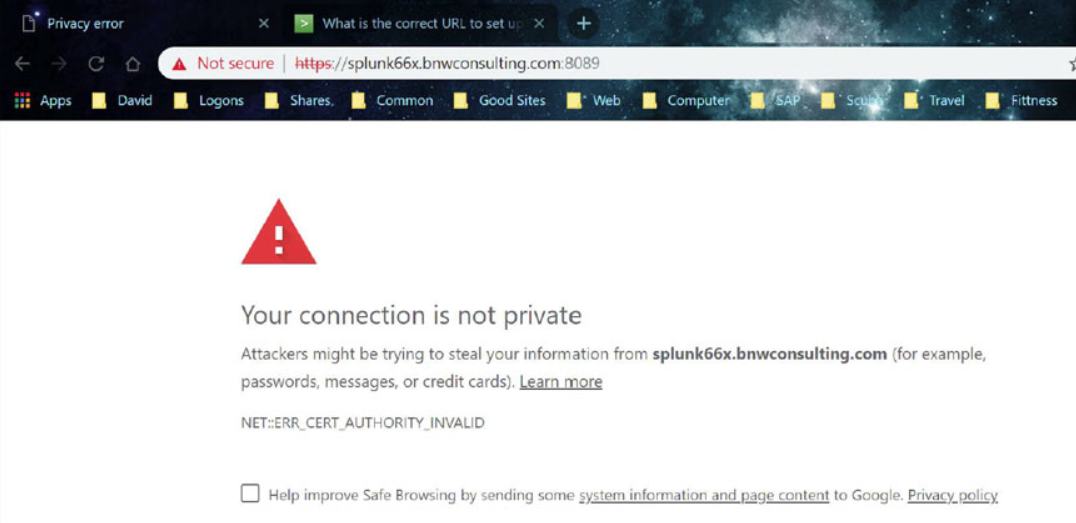
Connect to port 8089 of your Splunk server through a web browsers using the following format:
https://<Fully Qualified Domain Name:8089
Accept to continue to the website
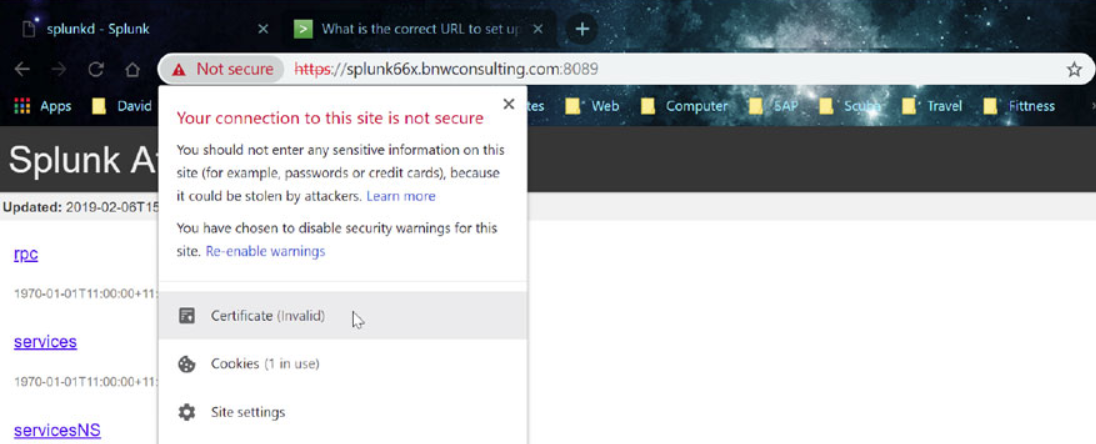
Click on the “Certificate (invalid)” message and then select “View Certificate”
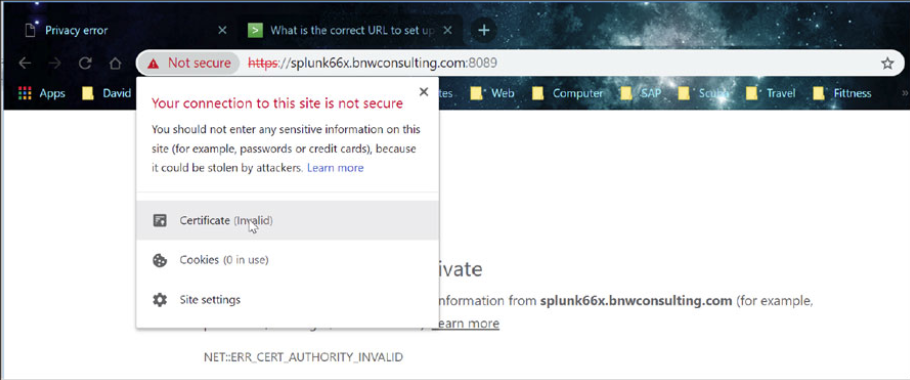
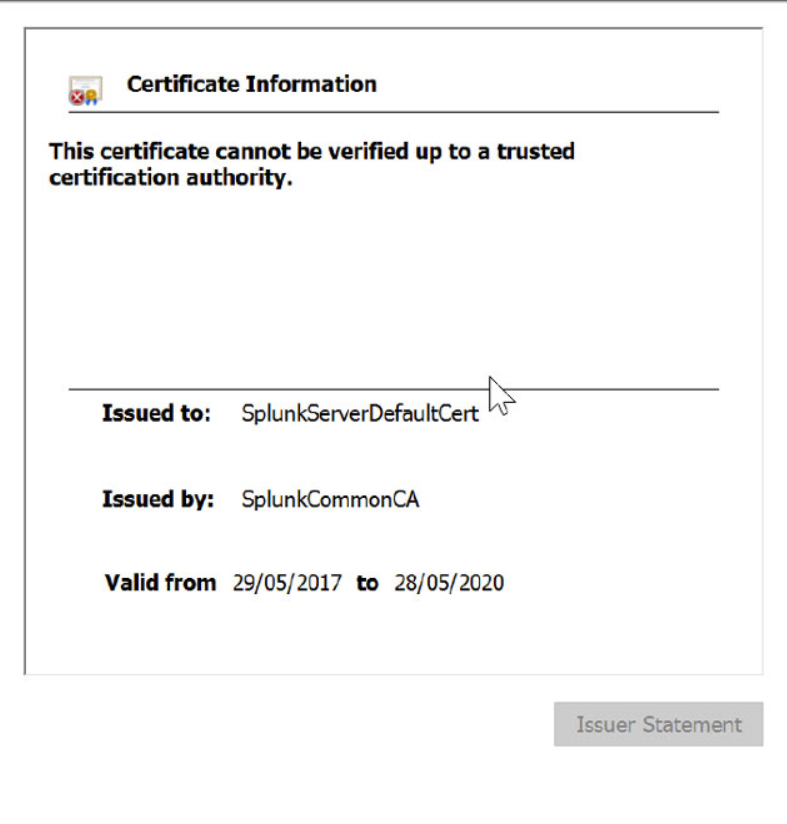
You can see the certificate does not match the FQDN of the server.
Initial Steps
Logon through RDP to the Splunk server and start a DOS command window. Change directory to the $SPLUNK_HOME\etc\auth directory of the Splunk installation.
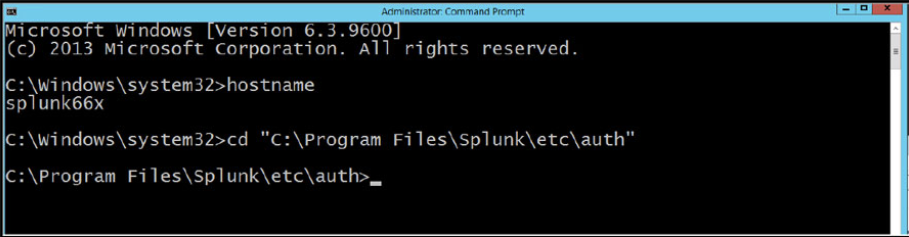
Make a directory call my “myCerts” using the command “mkdir myCerts”

Change to the myCerts directory

Create Root Certificate Authority/Create a Certificate Authority Private Key
“C:\Program Files\Splunk\bin\openssl.exe” genrsa -aes256 -passout pass:1234 -out myCAPrivateKey.key 2048 -config “C:\Program Files\Splun \openssl.cnf
Remove the Key Phrase from the Private Key
“C:\Program Files\Splunk\bin\openssl.exe” rsa -passin pass:1234 -in myCAPrivateKey.key -out myCAPrivateKey.key
Create Root Certificate Request
Use the following command to generate a request for the root certificate – in the example below I called my RootCA – SplunkCA.bnwconsulting.com.au
“C:\Program Files\Splunk\bin\openssl.exe” req -new -key myCAPrivateKey.key -out myCACertificate.csr -config “C:\Program Files\Splunk\openssl.cnf

Sign Root Certificate Request
Sign the certificate request with the Root CA private key.
“C:\Program Files\Splunk\bin\openssl.exe” x509 -req -in myCACertificate.csr -sha512 -signkey myCAPrivateKey.key -CAcreateserial -out myCACertificate.pem -days 1095
Create Server Certificate/Create Server Private Key
Create a private key for the server certificate
“C:\Program Files\Splunk\bin\openssl.exe” genrsa -aes256 -passout pass:1234 -out myServerPrivateKey.key 2048 -config “C:\Program Files\Splunk\openssl.cnf”
Remove Key phrase from private key
“C:\Program Files\Splunk\bin\openssl.exe” rsa -passin pass:1234 -in myServerPrivateKey.key -out myServerPrivateKey.key
Create Server Certificate request
Use the following command to generate a Certificate request that will be signed by the RootCA you have created. The name uses must match the FQDN of your Splunk server. In the example below I am generating a request for Splunk66x.bnwconsulting.com.au
“C:\Program Files\Splunk\bin\openssl.exe” req -new -key myServerPrivateKey.key -out myServerCertificate.csr -config “C:\Program Files\Splunk\openssl.cnf”

Sign Server Certificate Request
Use the following command to generate a response for the Server Certificate request from the Root CA Certificate.
“C:\Program Files\Splunk\bin\openssl.exe” x509 -req -in myServerCertificate.csr -sha256 -CA myCACertificate.pem -CAkey myCAPrivateKey.key-CAcreateserial -out myServerCertificate.pem -days 1095

Import Response
Import the Certificate response into the Splunk Server Certificate
copy myServerCertificate.pem+myServerPrivateKey.key+myCACertificate.pem mySplukServerCertificate.pem

mySplukServerCertificate.pem is now the SSL Certificate for your server.
Update Splunk Configuration/Certificate Files
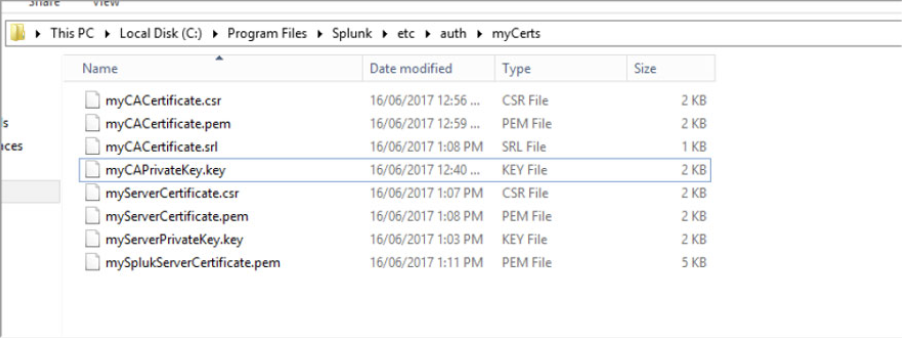
The following files will now exist in the “myCerts” directory
Root CA Files
myCACertificate.csr
myCACertificate.pem
myCACertificate.srl
myCAPrivateKey.key
Server Certificate Files
myServerCertificate.csr
myServerCertificate.pem
myServerPrivateKey.key
mySplukServerCertificate.pem
Update Splunk SSL settings
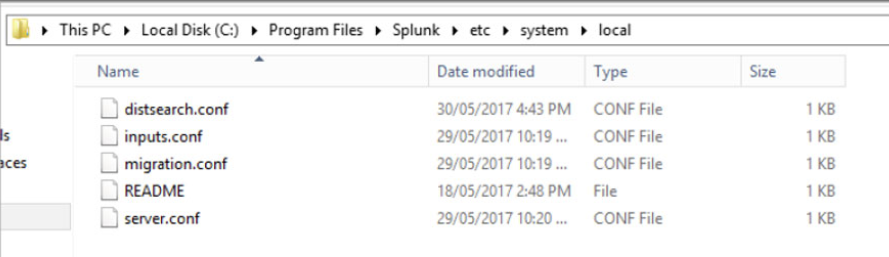
Navigate to the $SPLUNK_HOME\etc\system\local directory
Open server.conf and search [sslConfig]
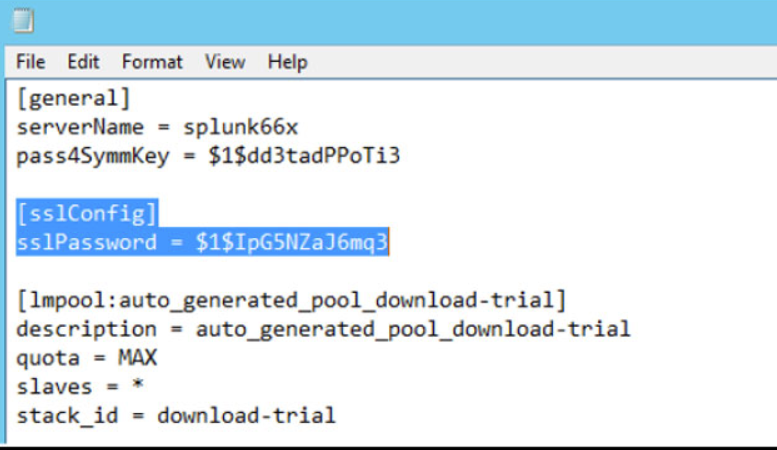
[sslConfig]
sslPassword = xxxxxxxxxxxx
Replace the information under [sslConfig] with the following information
[sslConfig]
caCertFile = myCACertificate.pem
caPath = $SPLUNK_HOME\etc\auth\mycerts
sslKeysfile = mySplukServerCertificate.pem
sslKeysfilePassword = 1234
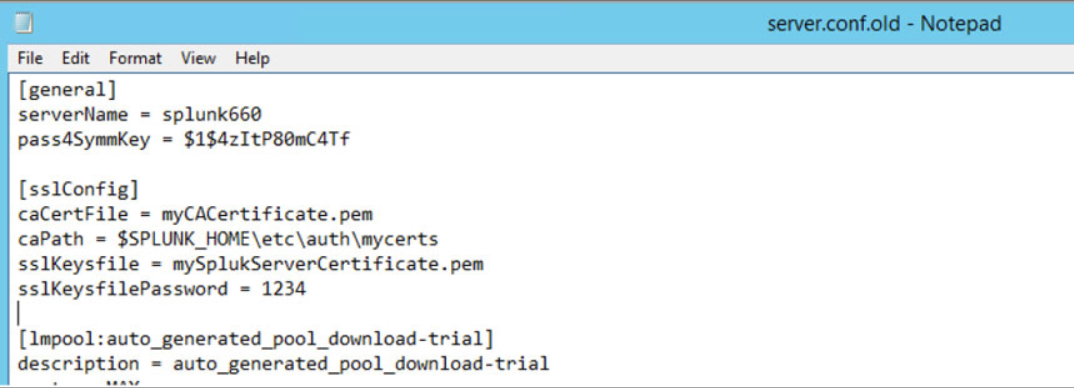
Save and close
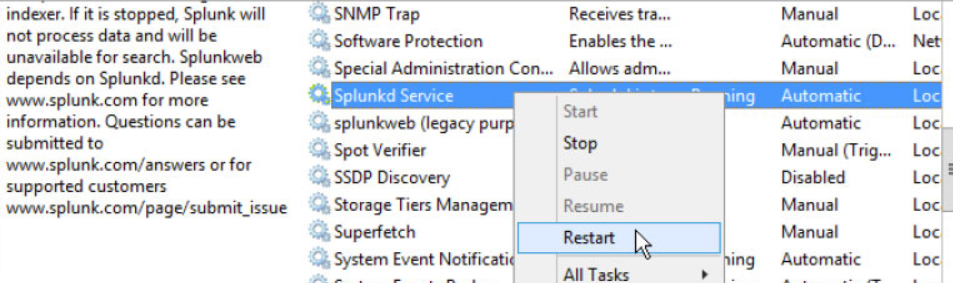
Restart Splukd Windows service
Test new certificate
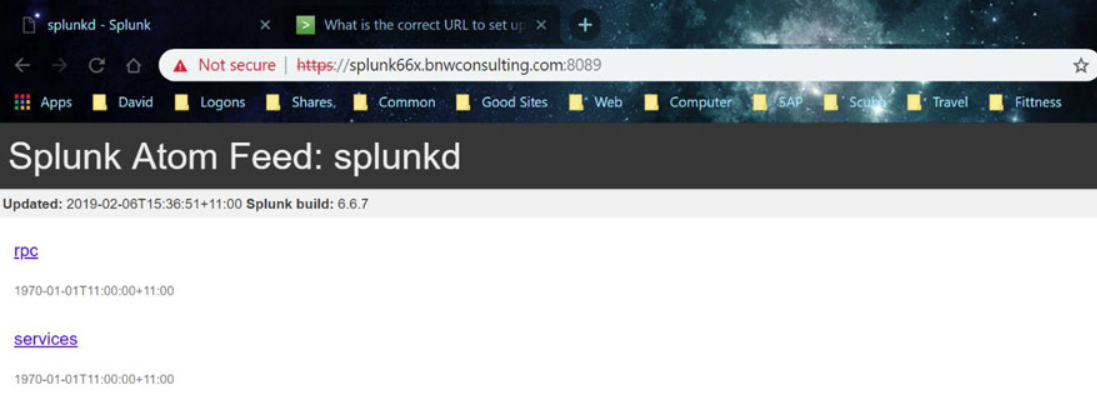
Connect to port 8089 of your Splunk server through a web browsers using the following format:
https://<Fully Qualified Domain Name:8089
Accept to continue to the website
Click on the “Certificate error” message and then select “View Certificate”
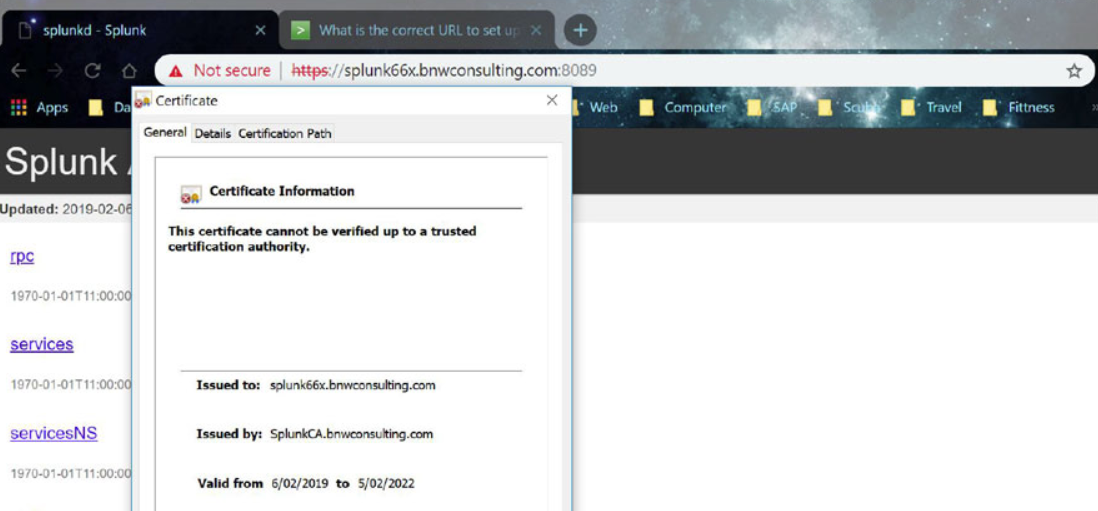
Verify the “Issued to” name of the certificate matches the browser name.
Product version
Product | From | To |
PowerConnect [NW,S4HANA,S4HANA Cloud] | [Affected version from] | [Affected version to] |