
PowerConnect for SAP Business Objects Agent Configuration
Configuration Steps
The agent configuration is stored a properties file located in the directory configured during the installation steps e.g.
$BOBJ_HOME/tomcat/conf/powerconnect.properties
The configuration file can be modified using the PowerConnect for SAP Business Objects UI. The steps to configure the agent consist of:
Applying a license key for the agent to start collecting data
Applying the PowerConnect user credentials created during the pre-installation steps
Setting the JMX RMI URL from the pre-installation steps
Configuring an outbound connection
Enabling the various extractors to collect data
These can be achieved by following the steps below:
Applying a License Key
Login to the PowerConnect Agent UI by browing to: http(s)://cmchost:port/powerconnect-java/index.html
e.g. http://localhost:8080/powerconnect-java/index.htmlClick Administration in the menu on the left and enter the License key
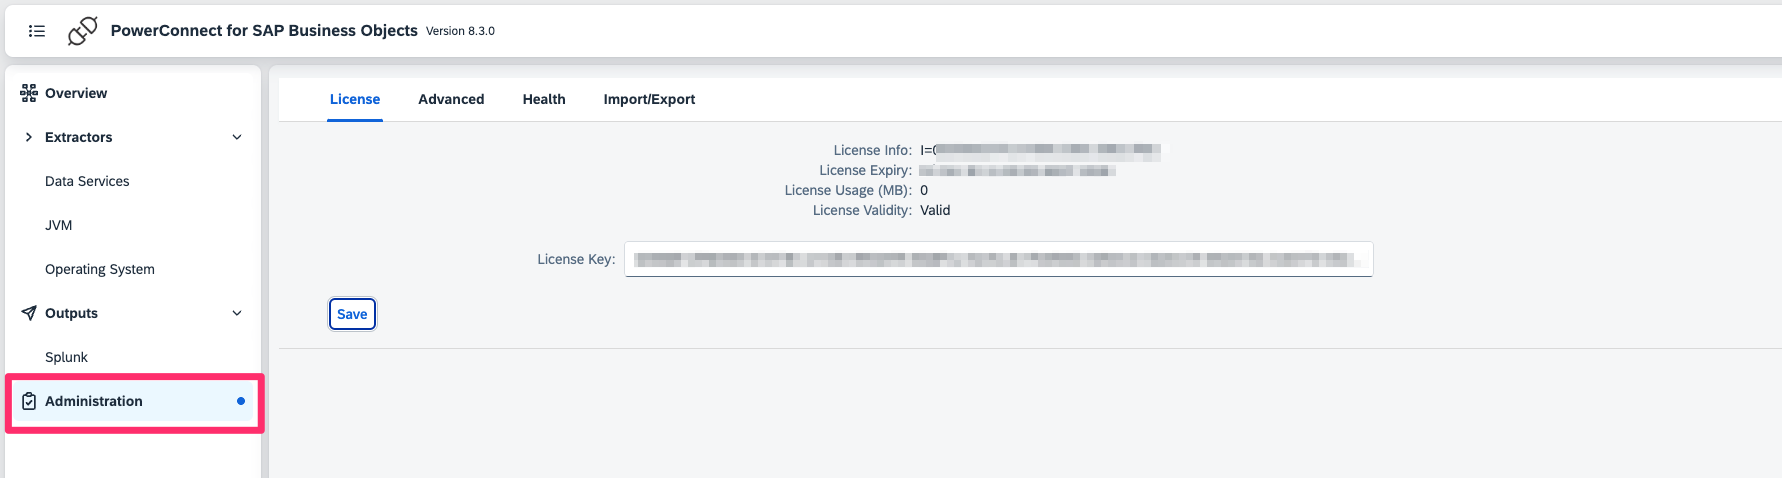
Click Save
The license details should be displayed
The license key is now applied
Restart the PowerConnect Agent (only required the first time the license is applied)
Applying the PowerConnect user credentials
In the PowerConnect Agent UI click Overview in the menu on the left
Under the Authentication section enter the PowerConnect username and password created in the pre-installation steps
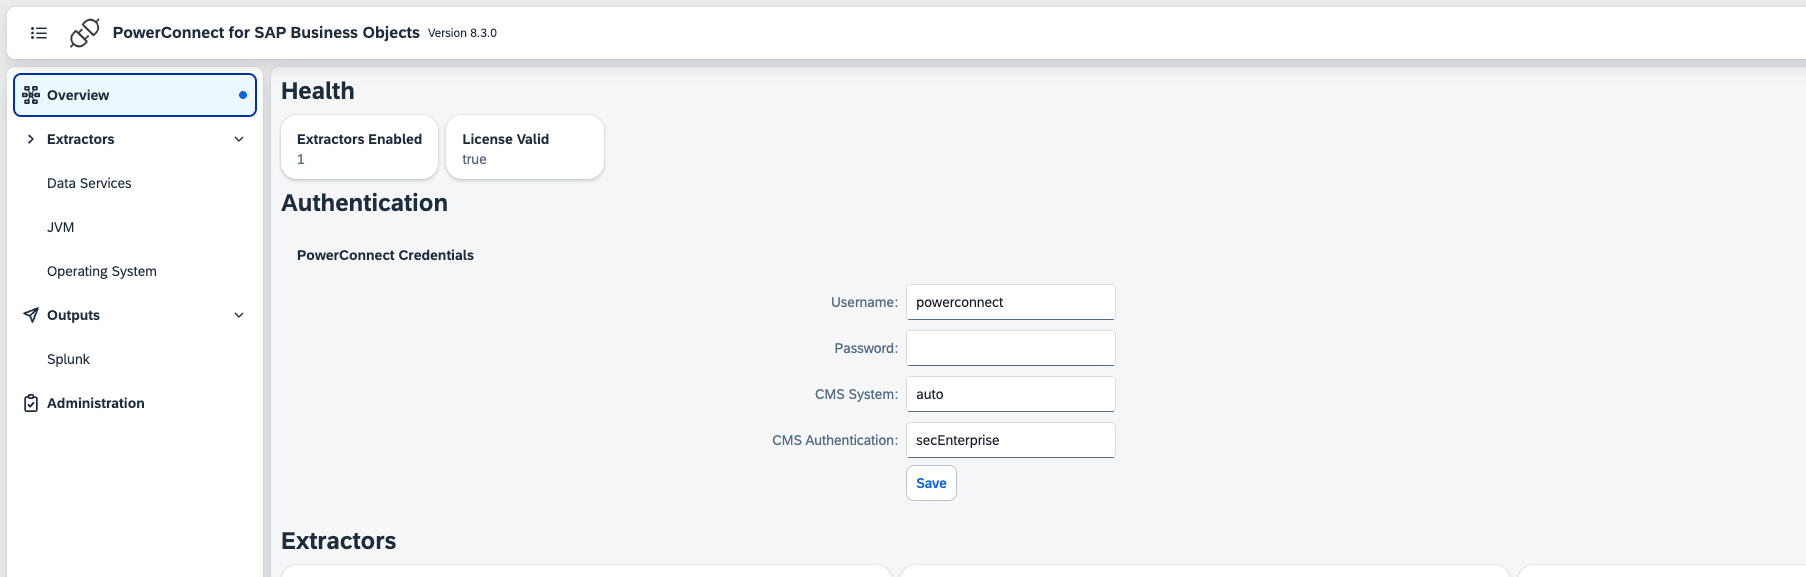
Note - The CMS System and CMS Authentication should be left at default values unless there is a problem with authentication
Click Save
The PowerConnect credentials have now been applied
Setting the JMX RMI URL
In the PowerConnect Agent UI click JVM under the Extractors menu on the left
Enter the JMX RMI URL
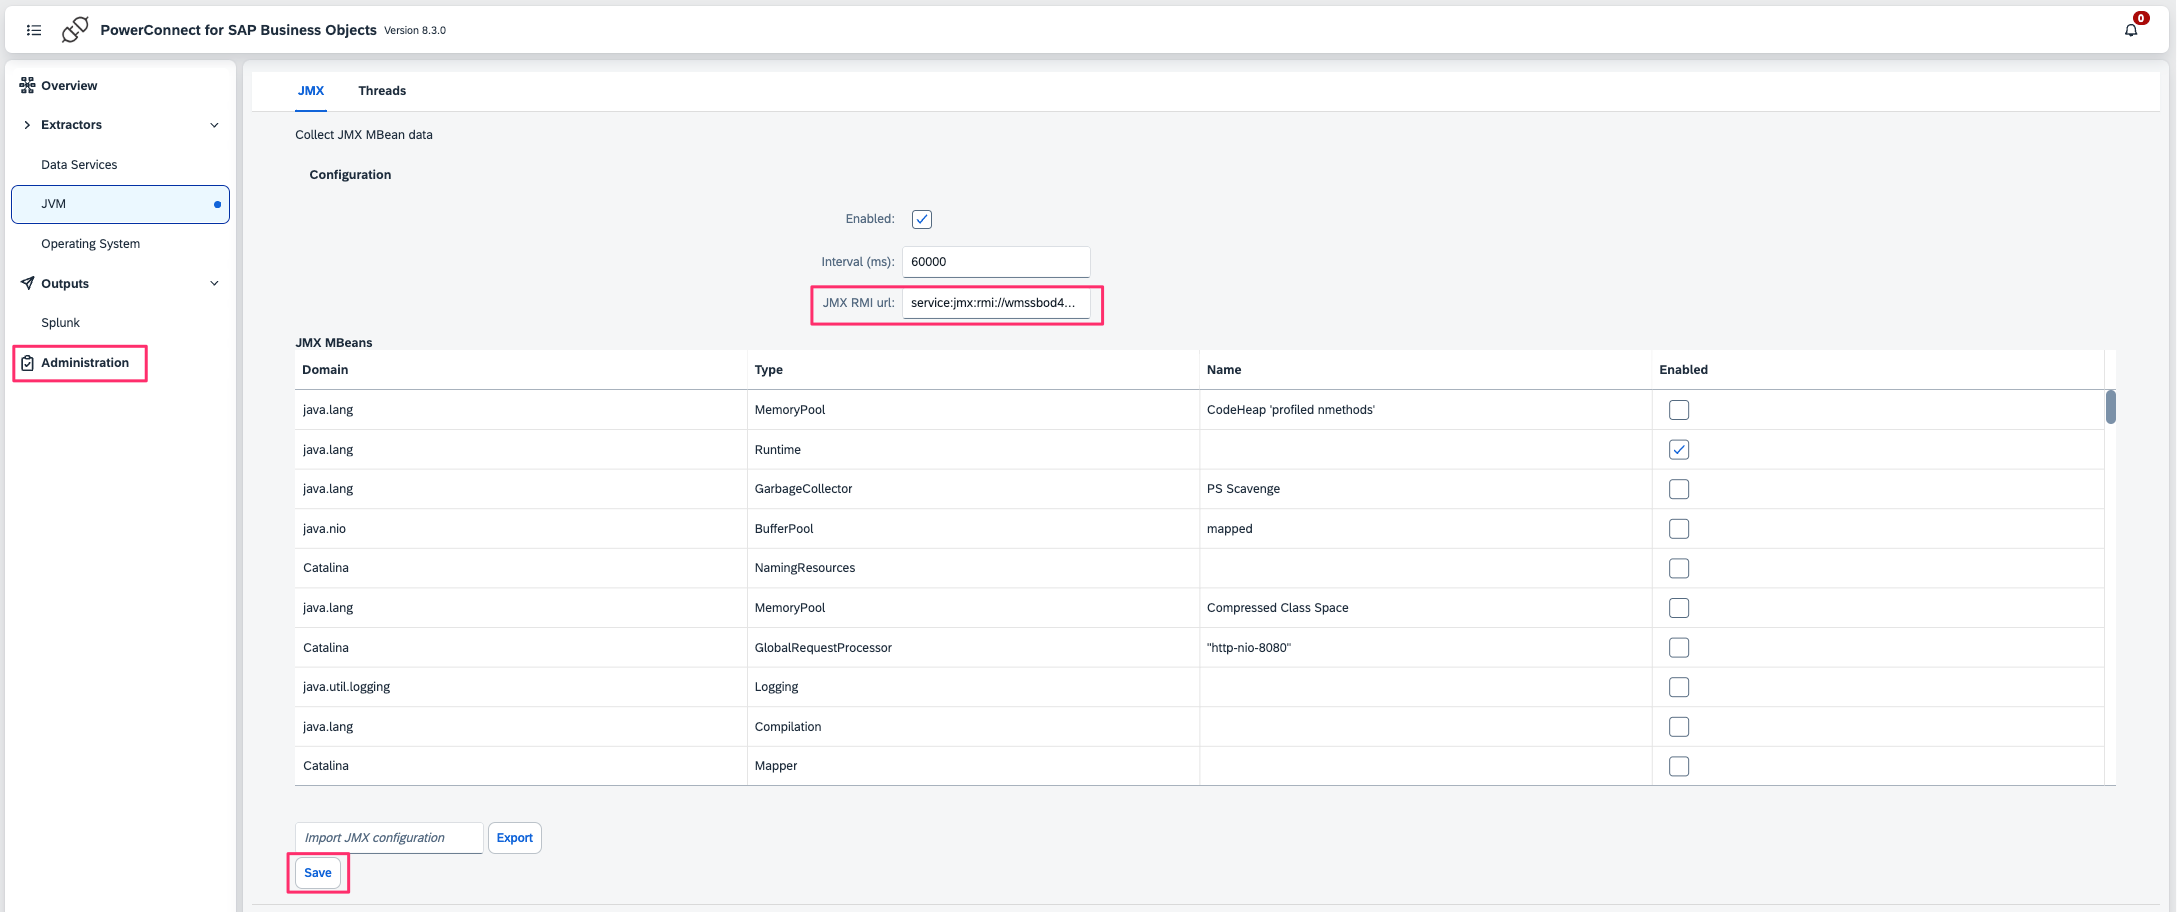
Click Save
Click Administration in the menu on the left and click the Health tab
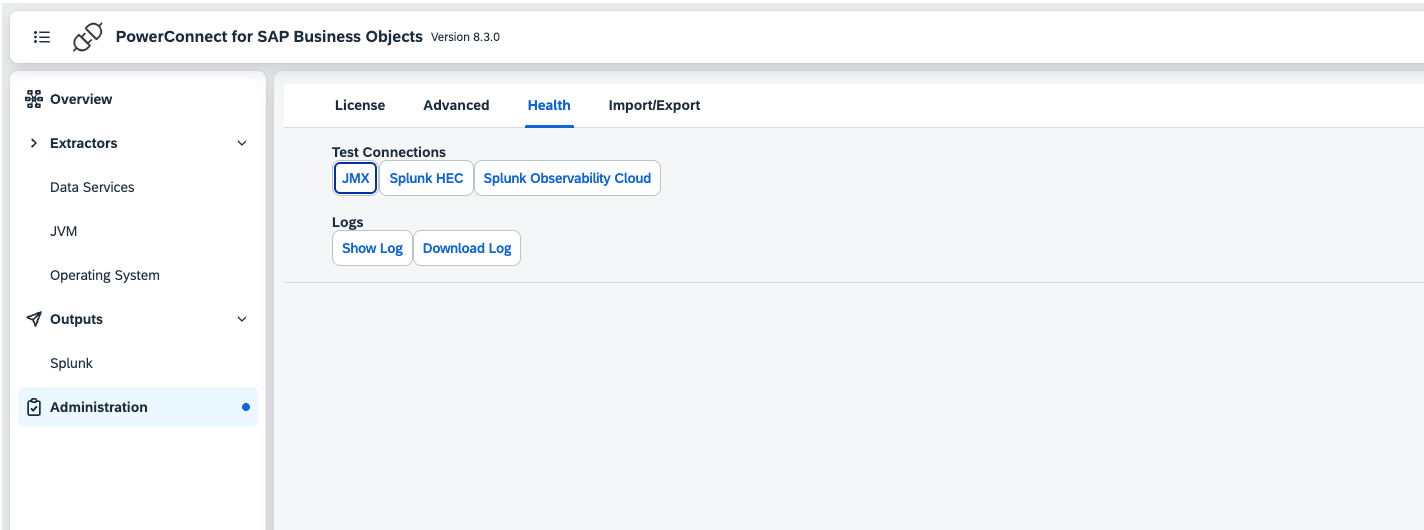
Under Test Connections click JMX
The JMX Connection test should be successful
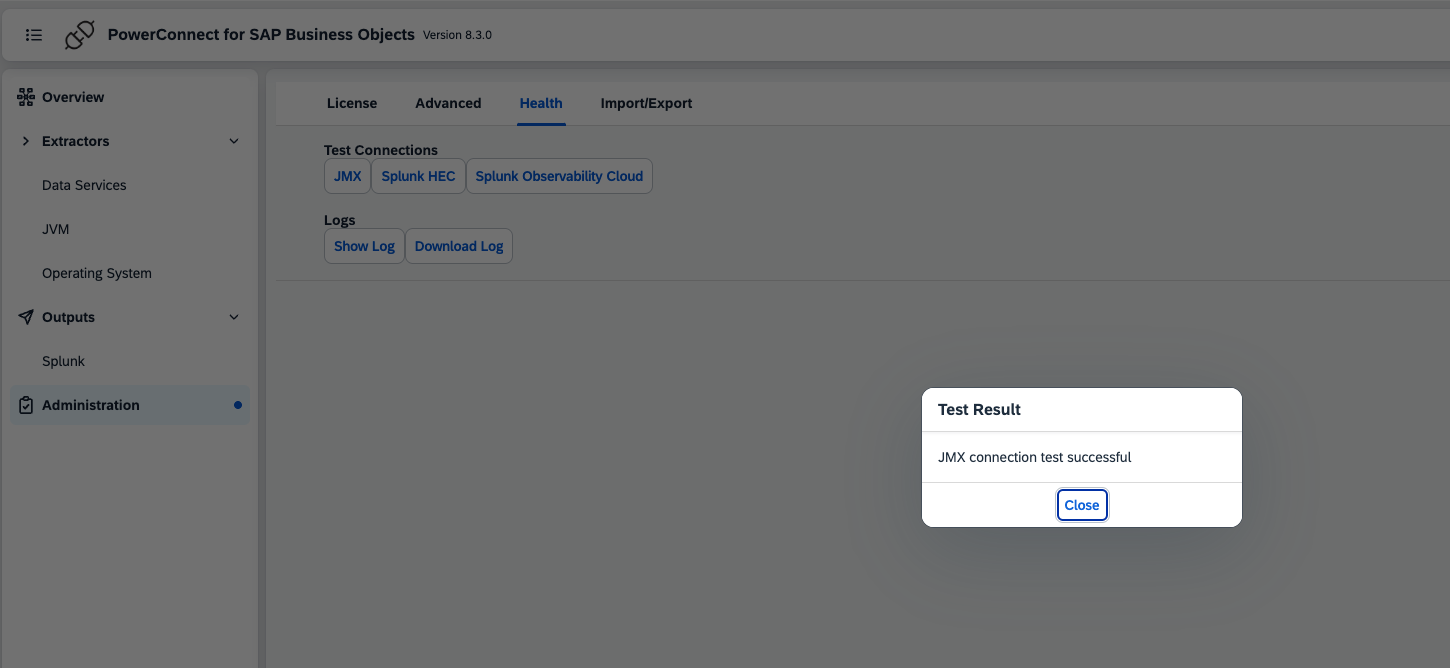
Note - If the test fails it means the JMX RMI URL is incorrect or the PowerConnect user credentials are incorrect
The JMX RMI URL is now configured
Creating an Outbound Connection
To configure an outbound connection follow the configuration guide for the target platform
Enabling Extractors
In the PowerConnect Agent UI click Overview in the menu on the left
In the Extractors section there are various extractors that can be enabled:
JVM - JMX: Collects various JMX MBean metrics such as CPU usage, Heap usage, Garbage Collection and various Business Objects specific metrics
JVM - Threads: Collects thread states, cpu usage and stack traces
Operating System: CPU - Operating system CPU usage (Linux only)
Operating System: Memory - Operating system Memory usage (Linux only)
Operating System: Disk Space - Operating system Disk space usage (Linux only)
Operating System: Network IO - Operating system Network Interface IO (Windows and Linux only)
Operating System: Disk IO - Operating system Disk Device IO (Windows and Linux only)
Check the extractors required
Click Save
The Extractors are now enabled
Configuration Options
Configuration | Description | Required | Default Value | Comments |
|---|---|---|---|---|
license_key | License key for the agent | True |
|
|
powerconnect_user | User for the agent to use to collect data from web services and jmx | True | ||
powerconnect_password | Password for the PowerConnect user | True | ||
cms_system | Which CMS system that PowerConnect user should connecto to | False | auto | Setting to auto means the agent will try to automatically discover the CMS system endpoint. Do not change this setting unless there is a problem with authentication |
cms_authentication | The type of authentication used | False | secEnterprise | Do not change this unless there is a problem with authentication |
jmx_enabled | Enable the JMX extractor | False | true | |
jmx_rmi_url | The JMX RMI url | True | This should be set to the JMX RMI in the pre-installation steps | |
jmx_mbeans | List of JMX Mbeans to collect | False | java.lang:type=OperatingSystem;java.lang:type=Threading;java.lang:type=Memory;java.lang:type=ClassLoading;java.lang:type=Runtime | |
jmx_interval | How often to collect JMX data (ms) | False | 60000 | |
cpu_monitoring_enabled | Enable operating system CPU monitoring |
| false |
|
cpu_monitoring_interval | How often to collect CPU metrics (ms) |
| 60000 |
|
memory_monitoring_enabled | Enable operating system memory monitoring |
| false |
|
memory_monitoring_interval | How often to collect memory metrics (ms) |
| 60000 |
|
os_process_monitoring_enabled | Enable operating system process monitoring |
| false |
|
os_process_monitoring_interval | How often to collect process metrics (ms) |
| 60000 |
|
disk_monitoring_enabled | Enable disk iops monitoring |
| false |
|
disk_monitoring_interval | How often to collect disk iops metrics (ms) |
| 60000 |
|
disk_space_monitoring_enabled | Enable disk space monitoring |
| false |
|
disk_space_monitoring_interval | How often to collect disk space metrics (ms) |
| 60000 |
|
network_monitoring_enabled | Enable network interface monitoring | False | false |
|
network_monitoring_interval | How often to collect network interface metrics (ms) | False | 60000 |
|
thread_monitoring_enabled | Enable thread monitoring | False | false | |
thread_monitoring_interval | How often to collect thread data (ms) | False | 60000 |