
Optional - Using SSL Encryption between SAP and Splunk (PowerConnect ABAP 6.X)
By default, Splunk REST API listens on port 8089 and HEC on Port 8088 with SSL active for Splunk Enterprise environments. Port 443 is used for Splunk Cloud environments. SAP supports SSL however some basic setup is needed to provide SSL functionality to the native HTTP client built in to the ICM to support HTTPS. You can disable SSL support in Splunk and use HTTP without SSL to communicate between SAP and Splunk however it is not recommended for a production environment, especially where Splunk traffic traverses a shared network or in a public or private cloud hosted solution for SAP or Splunk.
If you wish to enable SSL support in SAP ABAP, please follow the steps below.
Please note that the instructions below are for setting up SSL to Splunk with a default configuration that includes a self-signed certificate that is included into Splunk during installation.
Important Note(s):
If your Splunk Enterprise Server has a custom SSL certificate installed, the process is the same, however names you see in the examples will differ from the screen shots below.
If you connect to a Splunk server via a proxy server then you will need to install any certificates that may sign HTTPS requests that flow through it into SAP.
If you are unsure about how to configure SSL, or you get SSL chain-verify or peer verify errors in SAP log a support call. You will need a valid license and support agreement to get email and phone support.
Ensure that System environment variable SECUDIR is set, this normally points to the /usr/sap/<SID>/<Instance>/sec directory.
If further details are required for setting environment variables please refer to SAP OSS Note 1827566 – http://service.sap.com/sap/support/notes/1827566
Download the latest SAP Crypro library from SAP Marketplace and unpack into the instance executable directory
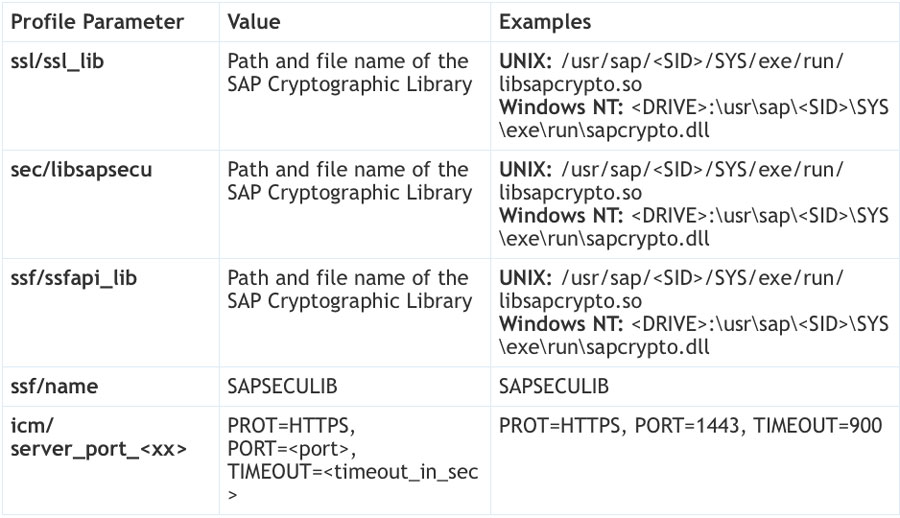
http://support.sap.com/swdc -> Support Packages and Patches -> My Application Components -> SAPCRYPTOLIBIn transaction RZ10 set the following profile parameters into the Default.pfl profile parameters. A restart of you SAP system is required after saving updated profile.
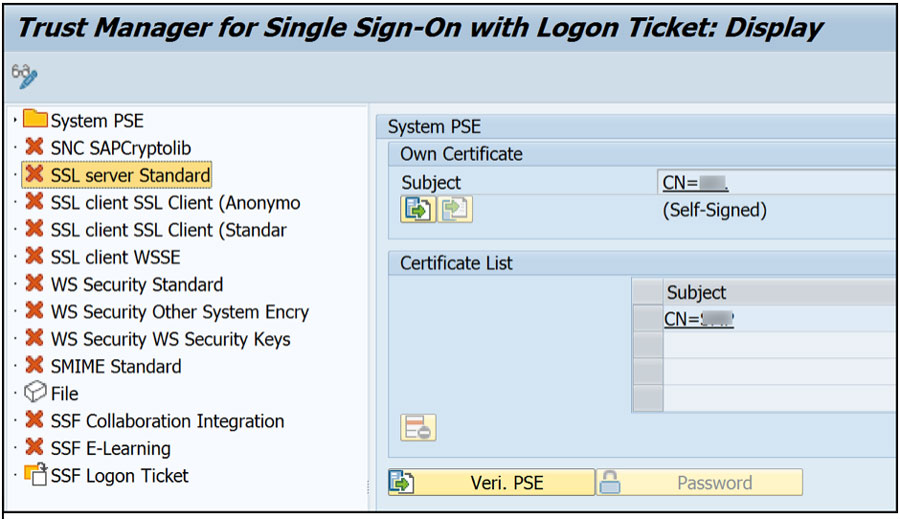
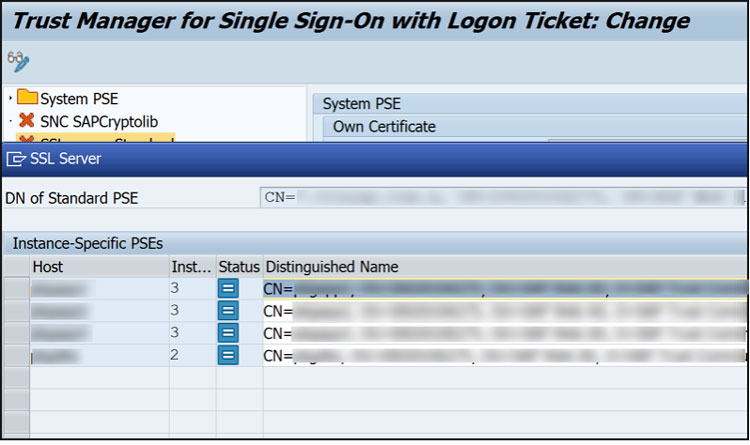
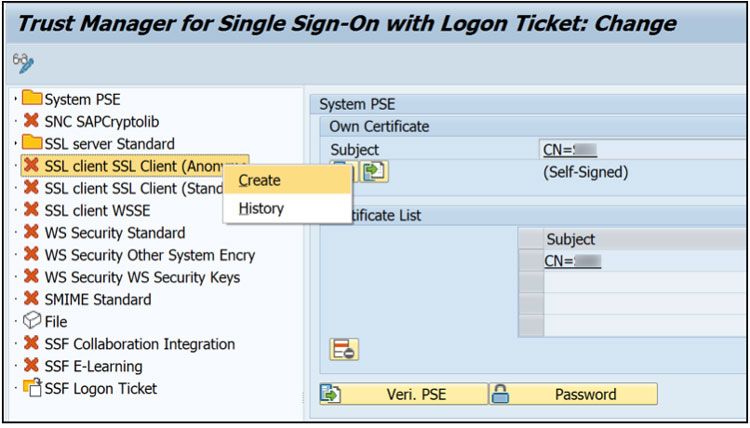
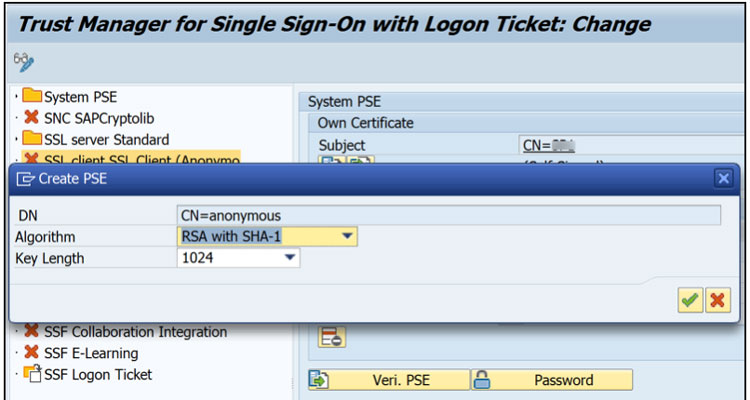
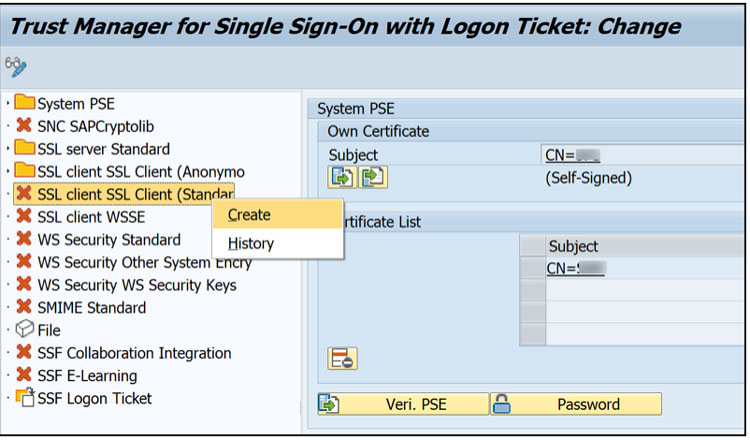
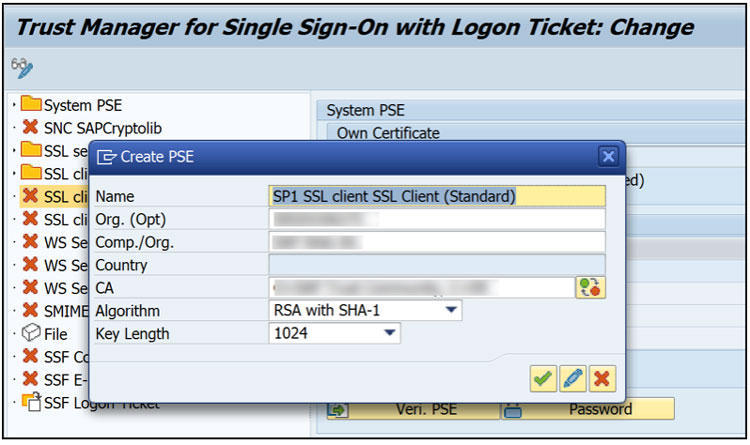
In transaction STRUSTSSO2 activate the following SSL nodes:
SSL Server Standard
SSL Client SSL Client (Anonymous)
SSL Client SSL Client (Standard)
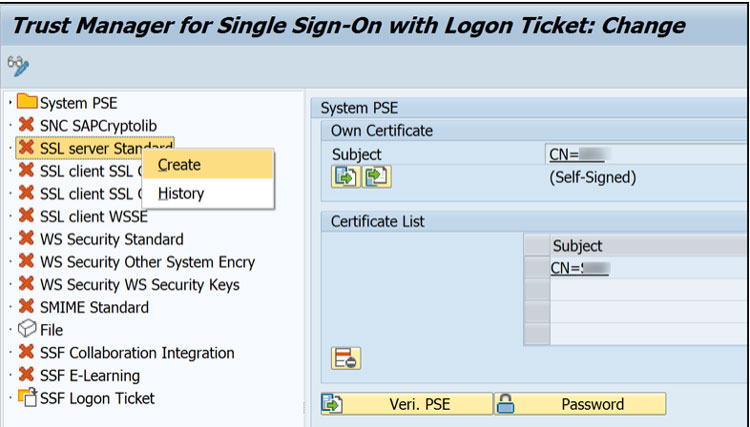
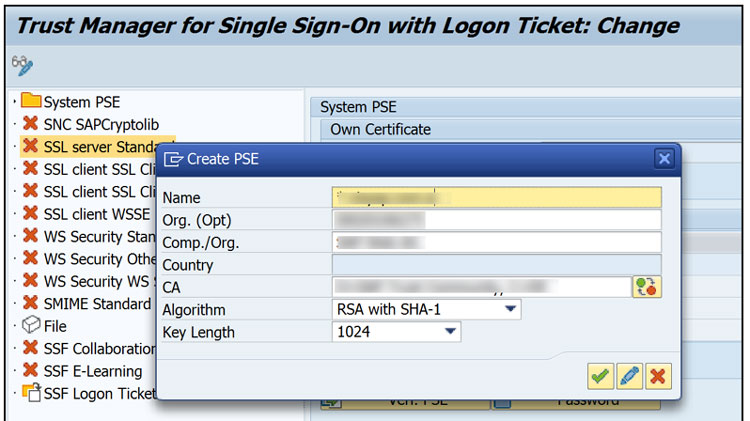
Activate by right clicking on each node and selecting “Create” – The default entry can be used unless specific security policies must be adhered too.
Change Mode ->
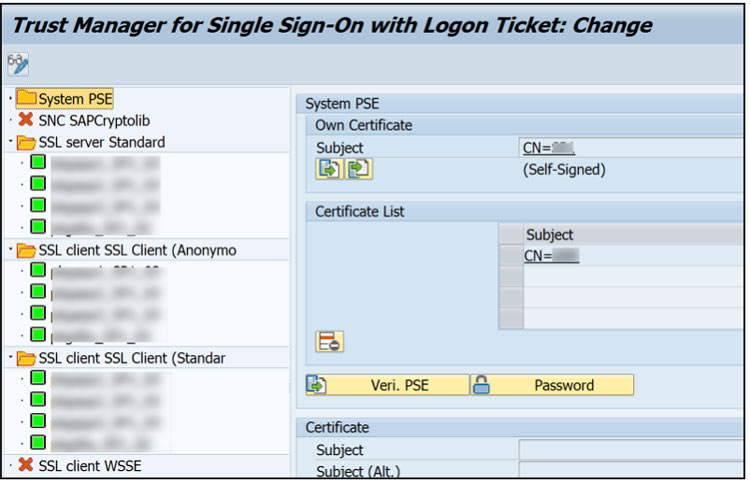
Next we need to ensure the ROOT CA (or server self-signed certificate is installed in the ABAP system).
Start transaction STRUSTSSO2.
Highlight the hostname under node “SSL client SSL Client (Standard).
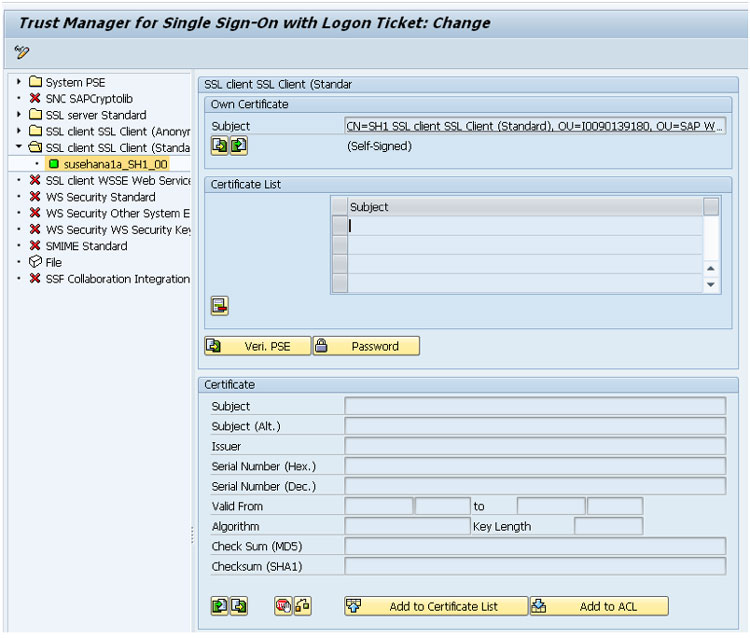
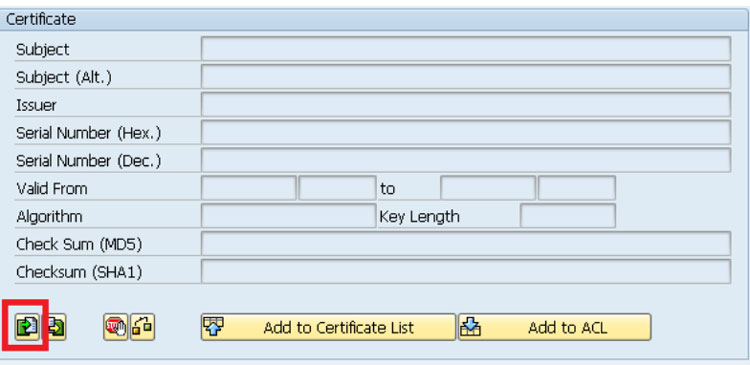
Click on the import button in the certificate section
Enter the file path of the Splunk RootCA Certificate or Splunk Server Self-Signed Certificate referenced in the Configure SSL in Splunk (Optional) section of the Splunk installation guide.
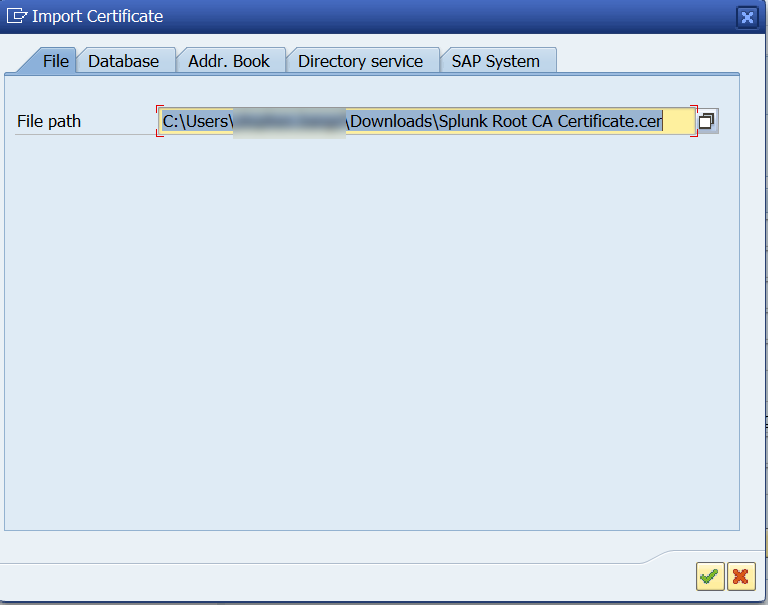
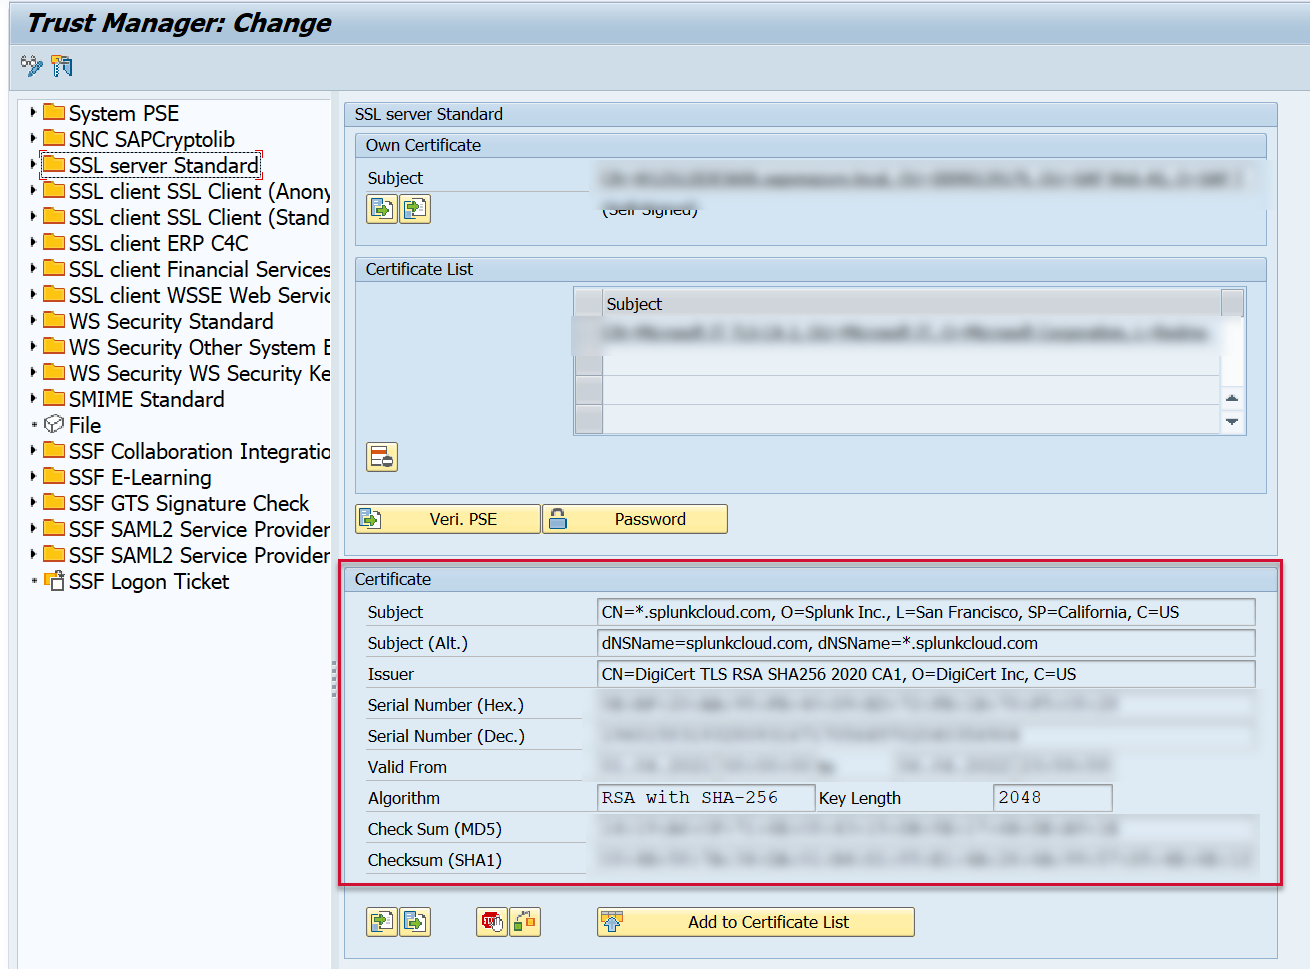
Now the RootCA or server self-signed certificate appears in the Certificate section.
Click on the Add to Certificate List button to add it to the Certificate List.
Note: The certificate shown below is if the customer has an Splunk Cloud environment. The same concept applies for Splunk Enterprise. The CN name should match the Splunk endpoint of where you are sending the SAP data.

Click Save in the toolbar to save this change

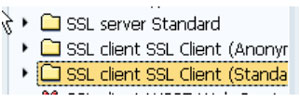
Repeat this change for the following 2 nodes
SSL server Standard
SSL client SSL Client (Anonymous)
Next step would be to actually connect the SAP system to Splunk using transaction /n/BNWVS/MAIN.