
Upload PowerConnect Roles (PowerConnect ABAP 7.X)
1. Add authorization object transport to the transport buffer
PowerConnect for Splunk uses dedicated roles in the SAP systems. These roles are prepared and included in your installation resources.
→ Ensure that you have the roles fitting to the current release. In case of doubt raise a message to PowerConnect support: Raising a PowerConnect Support Request.
→ Ensure that you put the roles as transports into co and datafile directory of transdir.
Start transaction STMS.
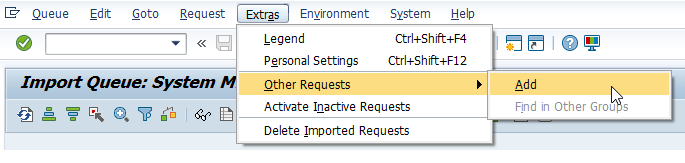
Change to Import Queue view and navigate to menu point “Extras → Other Requests → Add”.
Select transport “N71K904982” (the transport is release dependent and might has different number in actual release. Please use the one shared with installation packages).
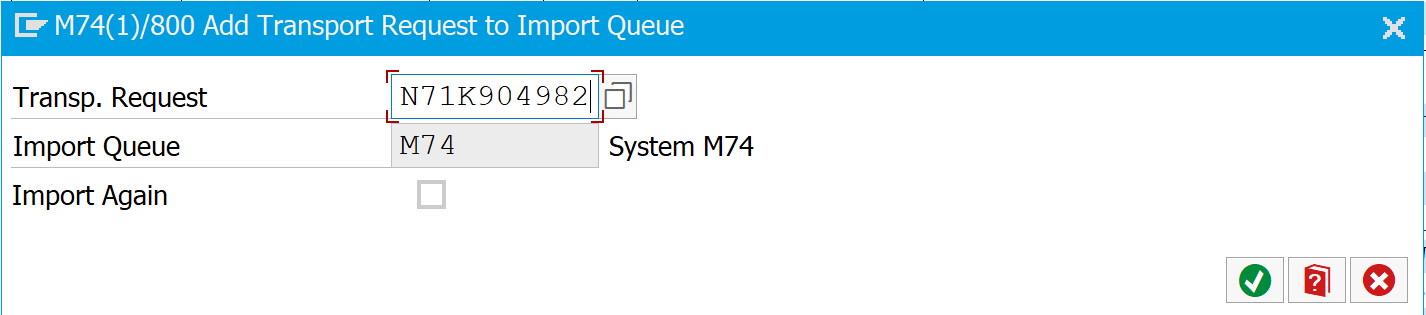
Add the transport request to the queue.
Finally select the transport and import it by navigating to menu item ”Request → Import”.
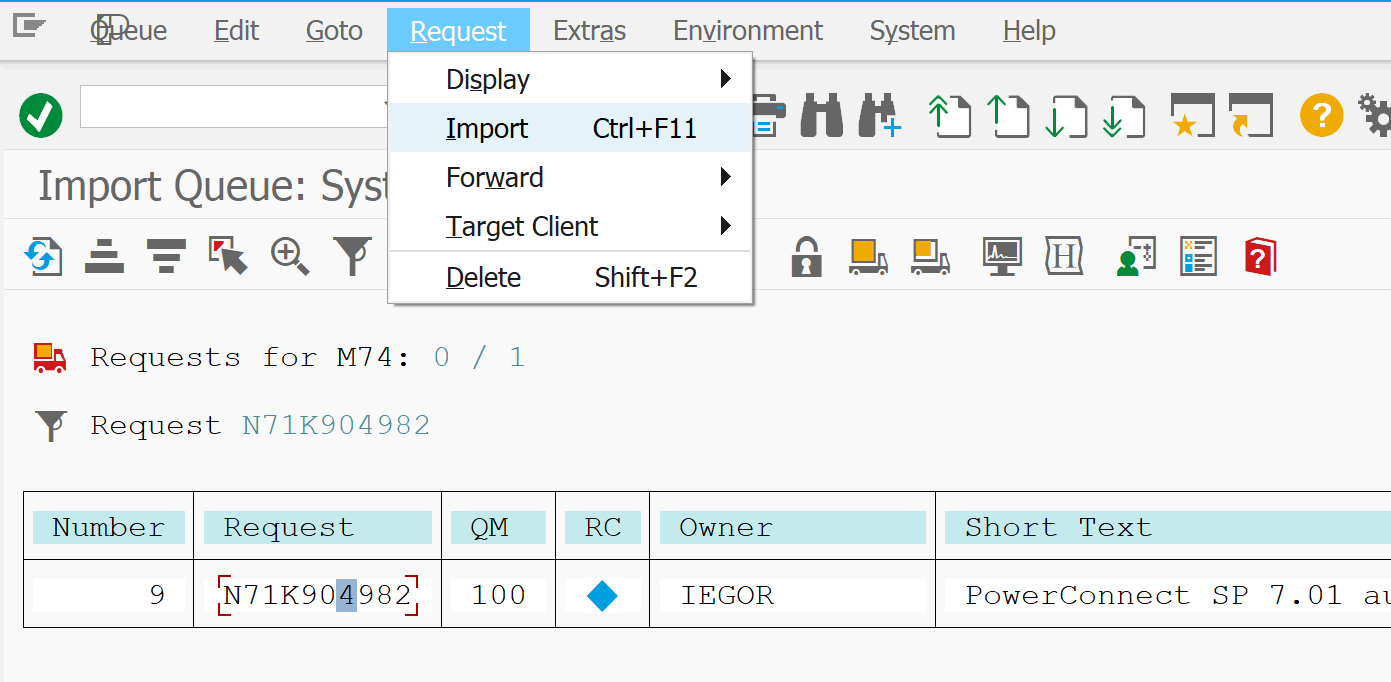
Ensure that you check “Ignore Invalid Component Version” in the subsequent Options menu. This is needed to avoid errors that may rise in the following import phase.
Ensure that the transport containing the authorization object is imported into the client in which PowerConnect is installed and administered. In other words import the transport into the client in which the BC set activation was performed
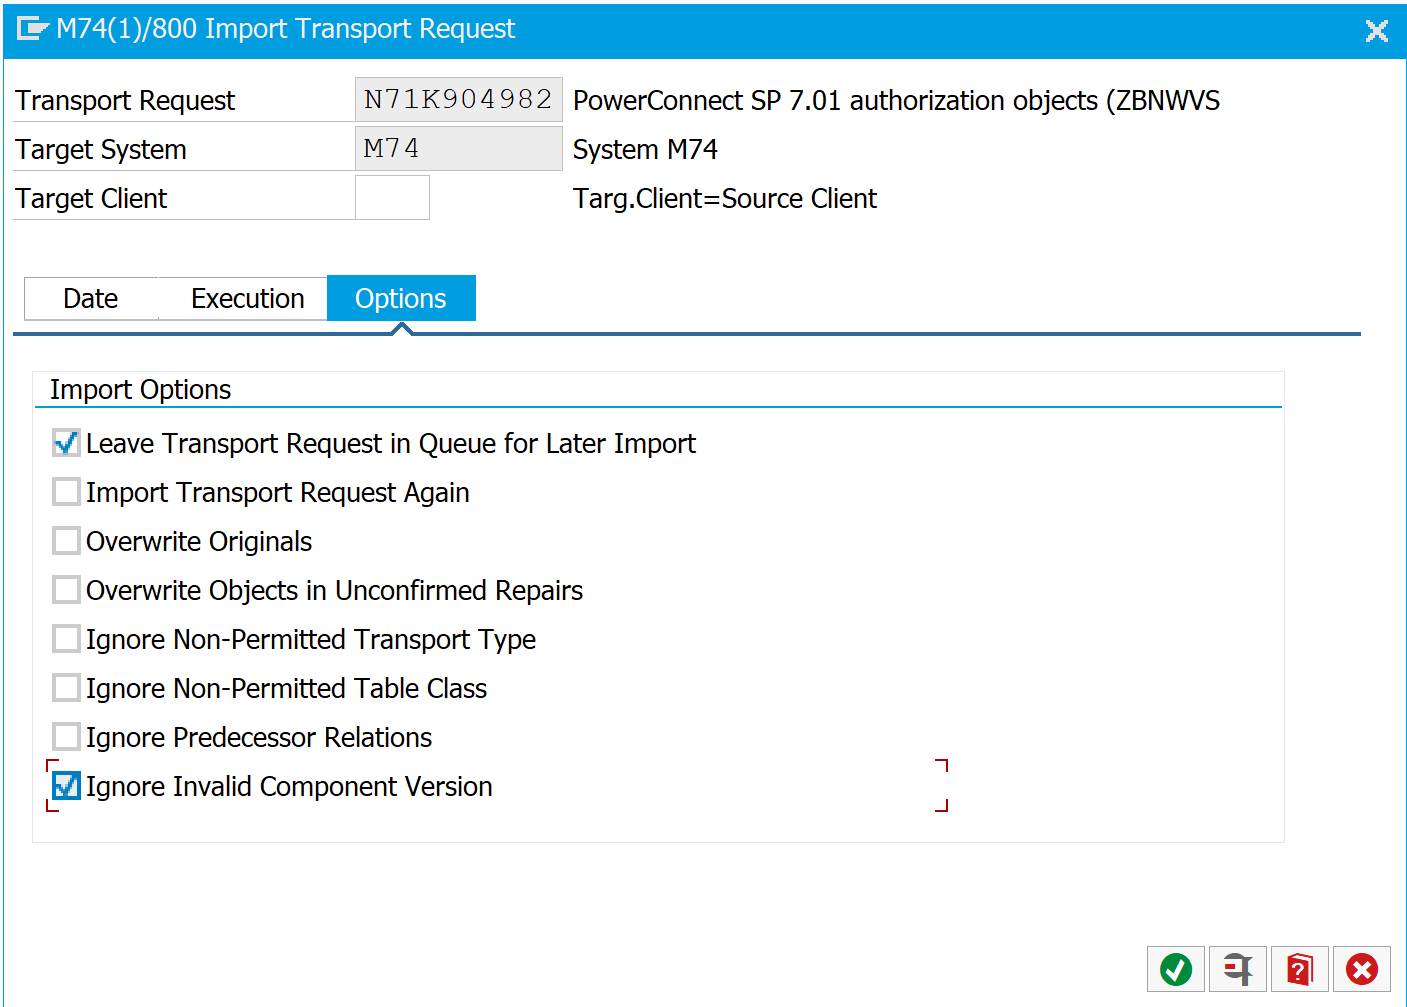
Other selections ( Apart from Ignore Invalid Component Version ) in the screenshot above are just for reference, please contact your Basis team for clear instructions
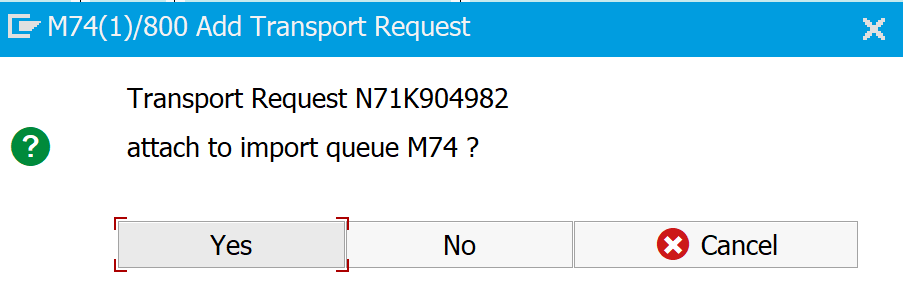
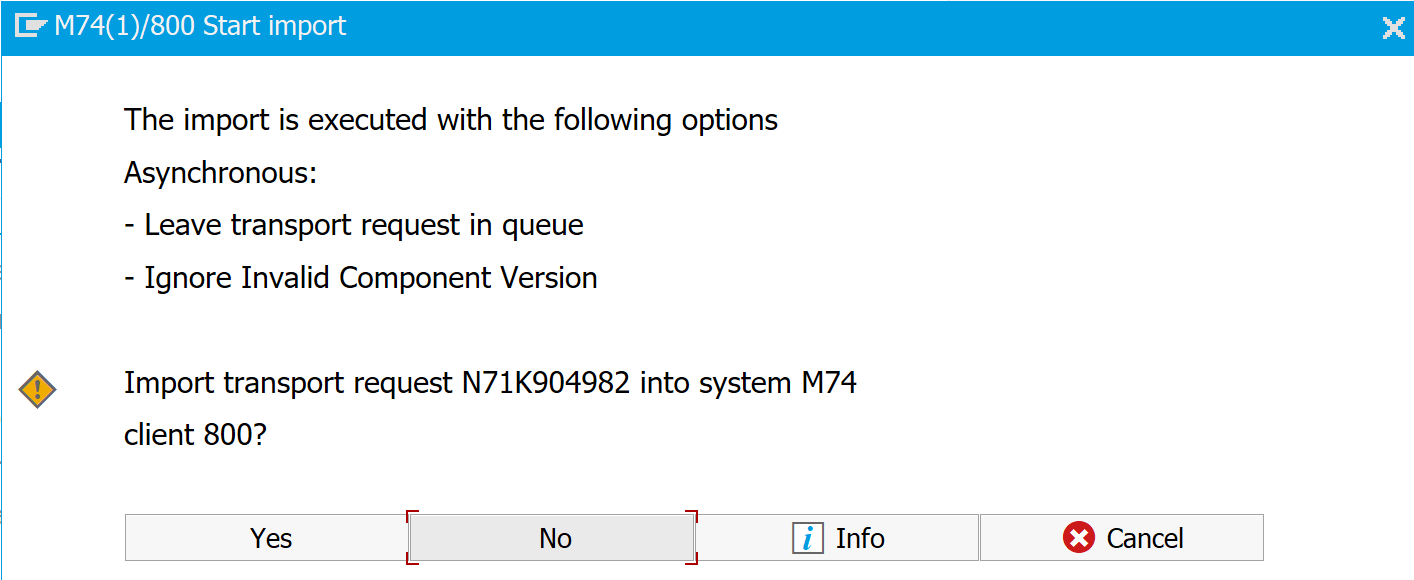
In the following dialog Press Yes to import the roles to your SAP system.

2. Upload PowerConnect roles
→ Ensure to have the four roles accessible on your PC. If you miss them, please contact your distributor or send an e-mail to support@powerconnect.io.
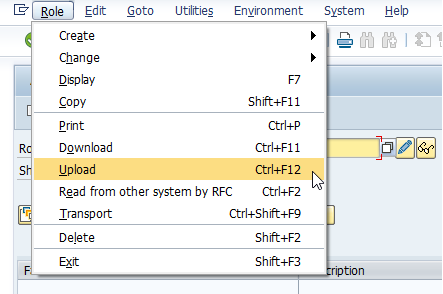
Start transaction PFCG.
Select the menu entry “Role → Upload” to upload files from your local disk.
Select the role file and Open it.
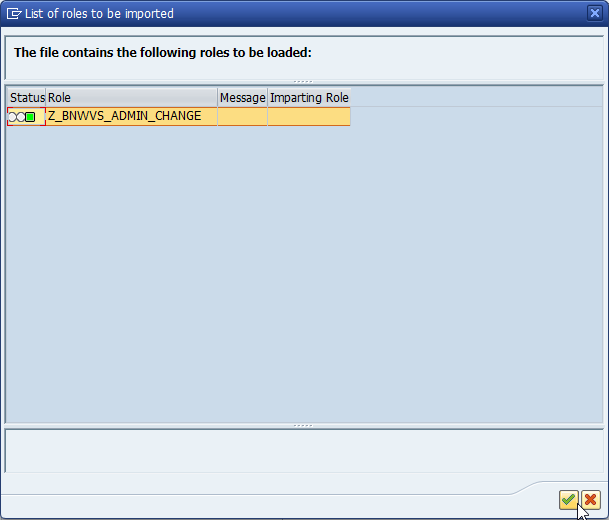
Confirm the role, contained in the file.
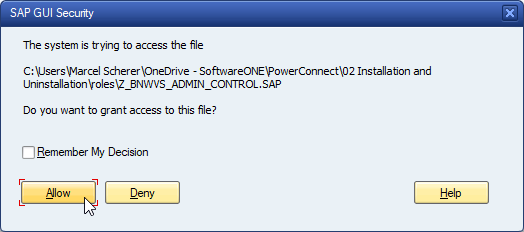
Usually you’re asked for granting access to the external file. Grant access!
→ If you’re not allowed to do so or if you have doubts regarding system security, please consult your local security officer and/or PowerConnect support via support@powerconnect.io.
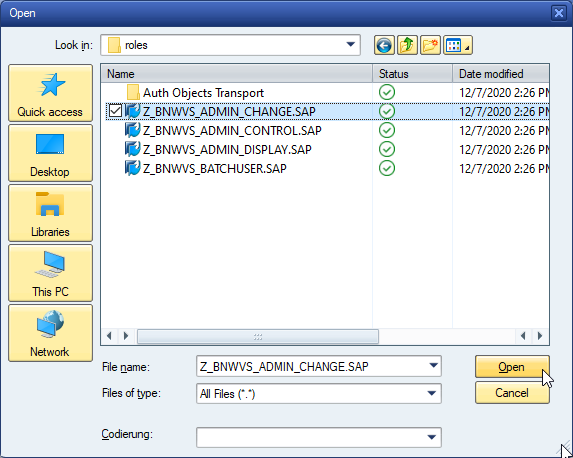

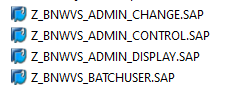
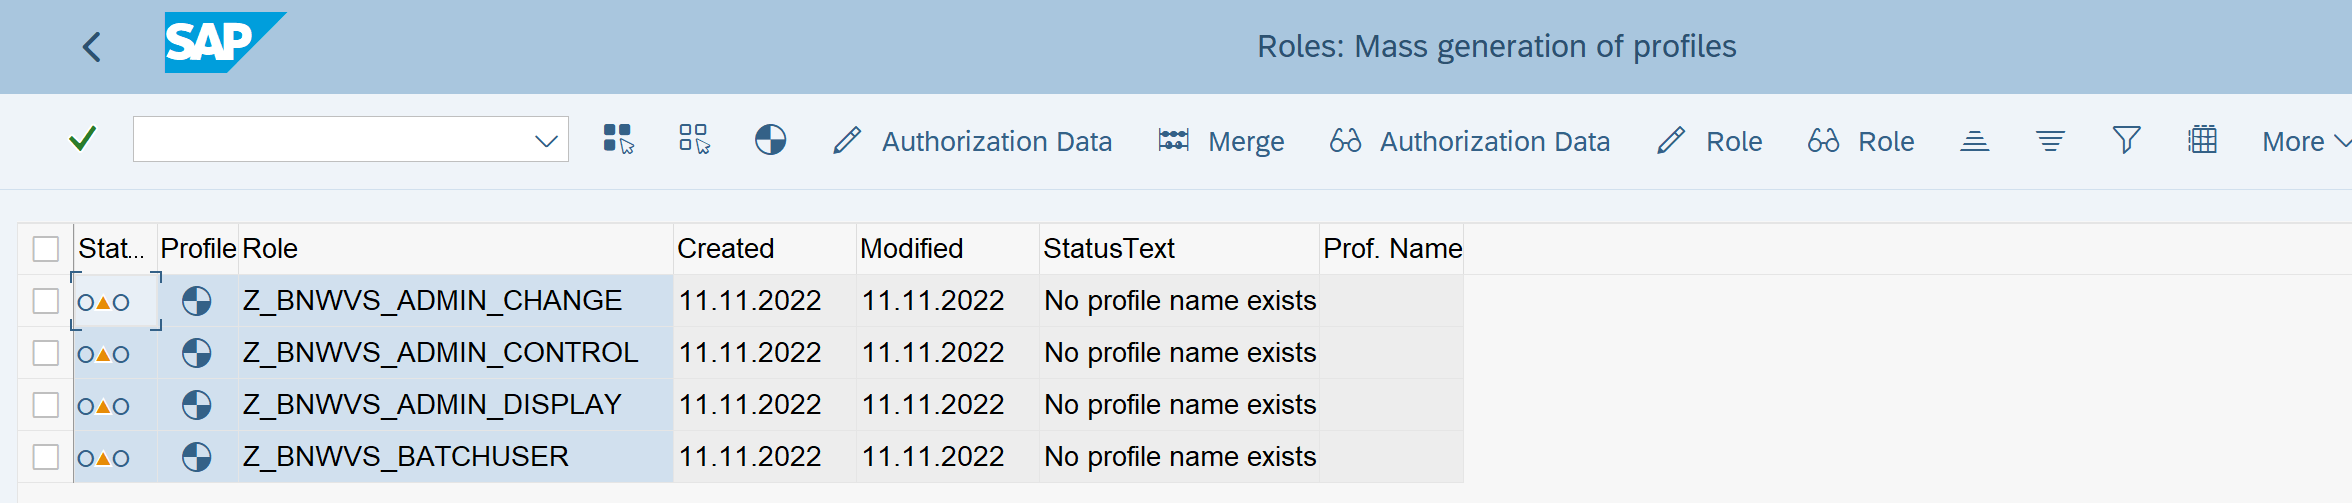
Do this for each of the four role files, which are
Z_BNWVS_ADMIN_CHANGE.SAP
Z_BNWVS_ADMIN_CONTROL.SAP
Z_BNWVS_ADMIN_DISPLAY.SAP
Z_BNWVS_BATCHUSER.SAP
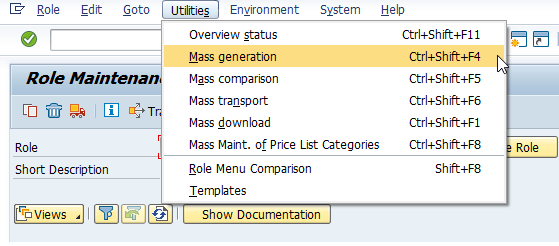
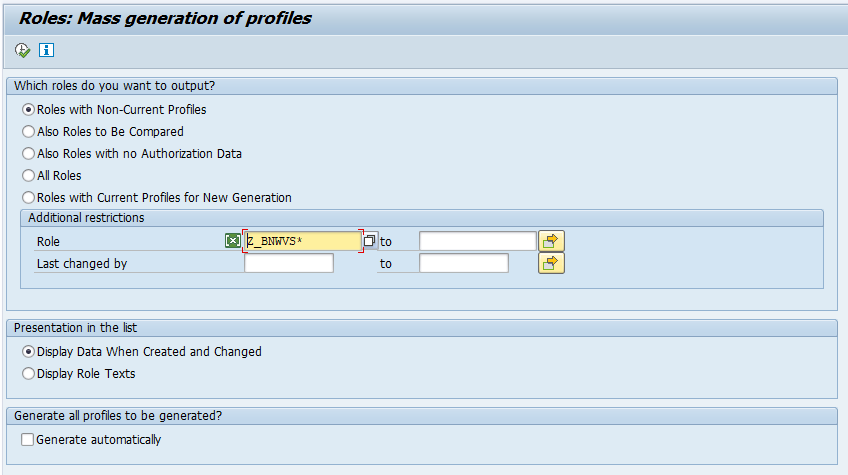
Generate the roles using mass generation via menu item “Utilities → Mass generation”.
Restrict the role name to Z_BNWVS*. So it will generate every role fulfilling this pattern.
Select all the profiles and generate them using “Roles → Generate profile…”.
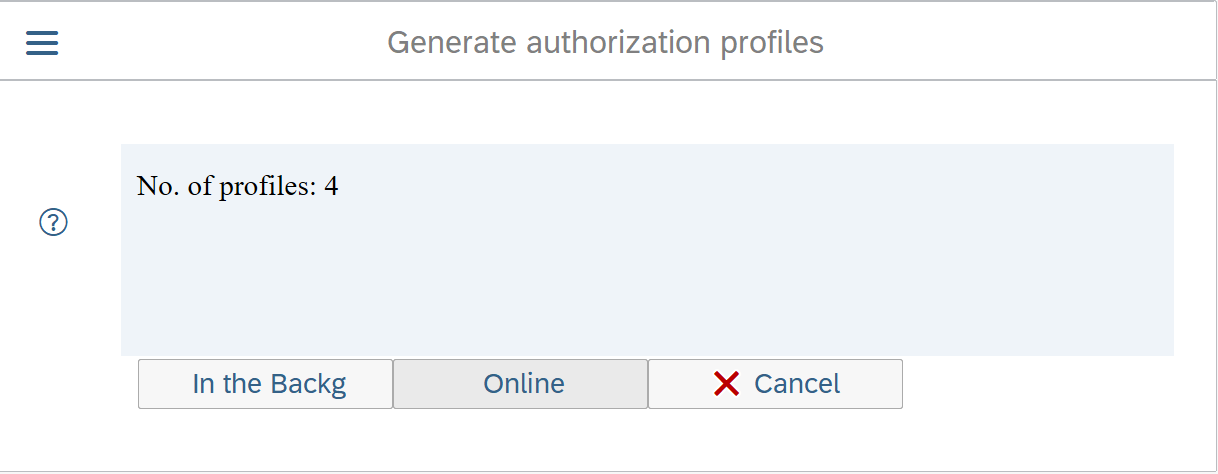
Please choose to run the process online.
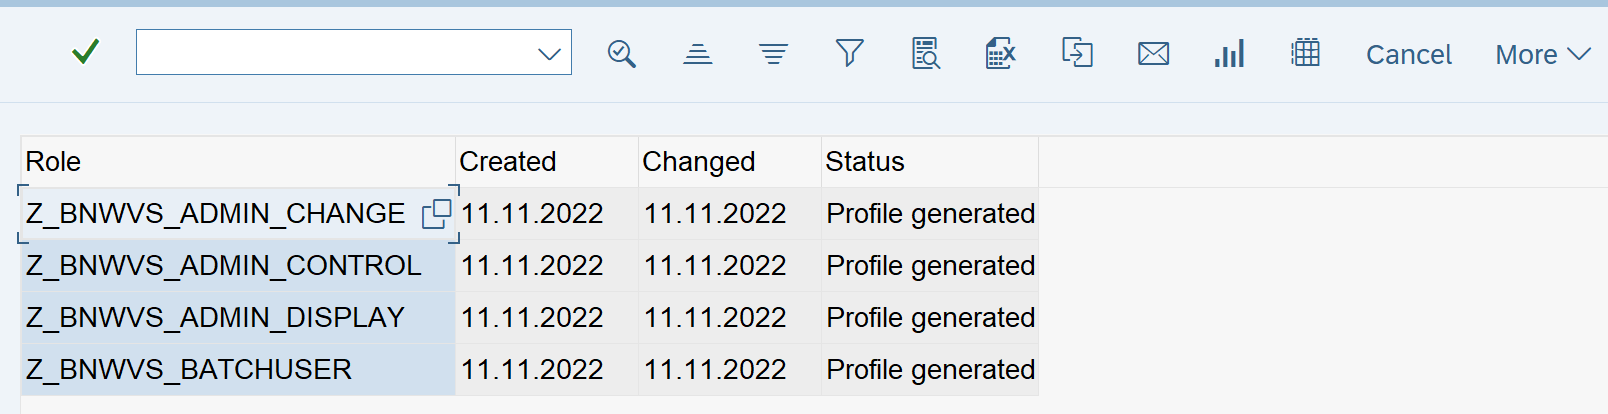
Profiles are generated.
You will now need to assign these roles to users in the system. Please follow the steps outlined in Assign PowerConnect Roles to Users.