
Create Security User and Role (PowerConnect Java - All Versions)
Once the agent is installed, there are some basic security objects that need to be created, these include:
Create PowerConnect role
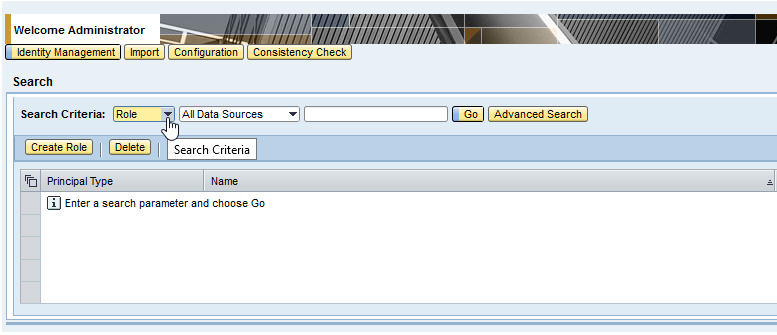
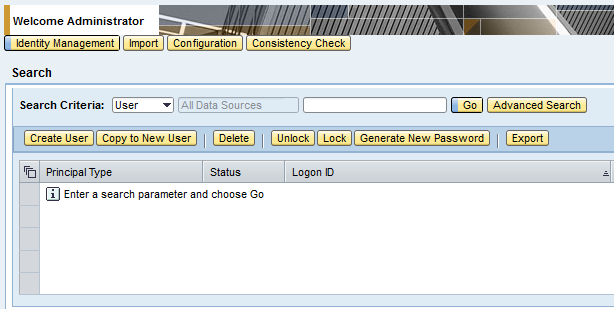
Open a browser and navigate to the User Administrator page http://<sap host>:<sap port>/useradmin/index.jsp
Select Criteria=Role
Click Create Role

Search for JmxManageAll in available actions & highlight both roles
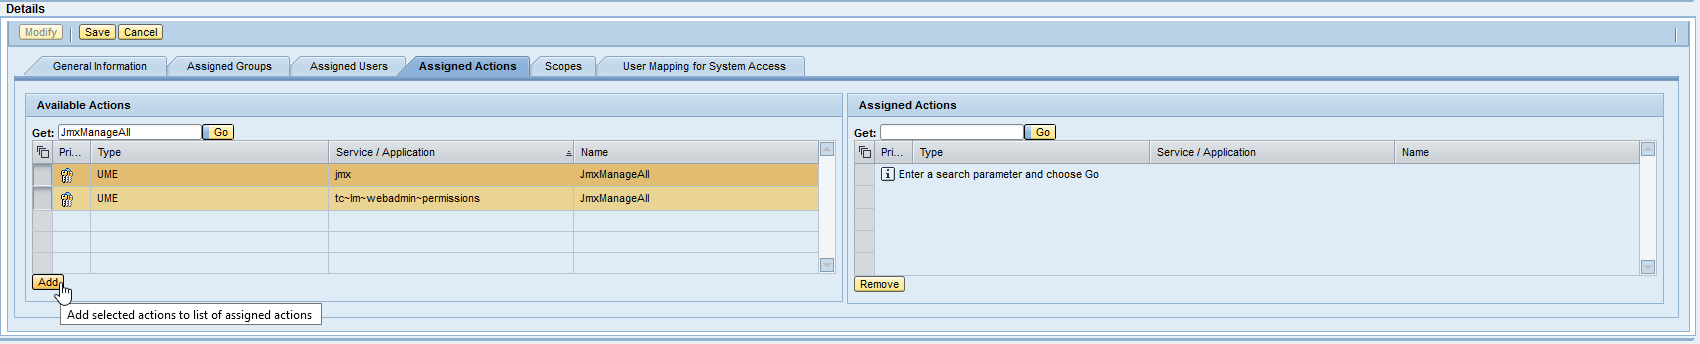
The roles should appear on right in Assigned Actions
Search for SystemInfo_Support_Role
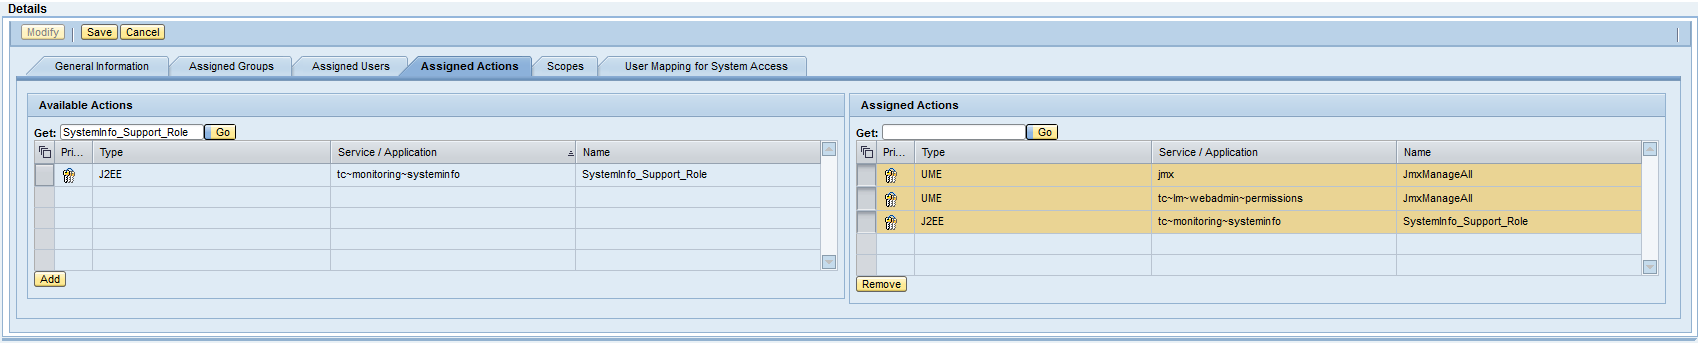
Highlight it and click ADD
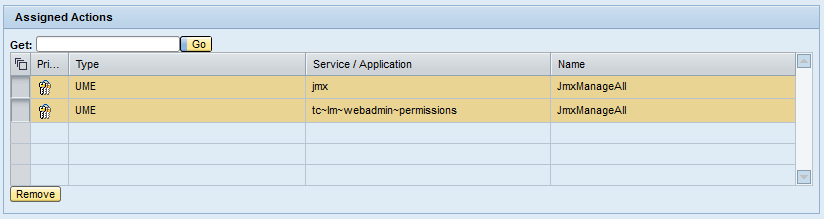
Ensure these 3 roles are on the right
SystemInfo_Support_Role
JmxManageAll x2
dbpool
And click SAVE
Create powerconnect technical user
Open a browser and navigate to the User Administrator page http://<serverhost>:<port>/useradmin/index.jsp
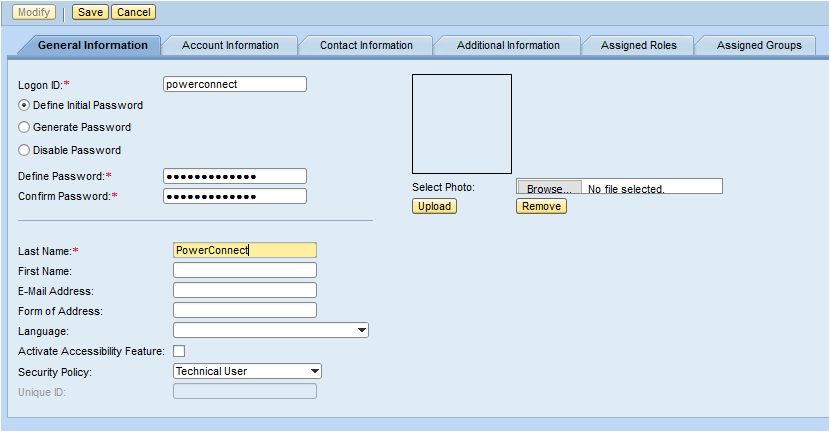
Click Create User
Create user powerconnect (all lowercase), enter password, and set it as a Technical User
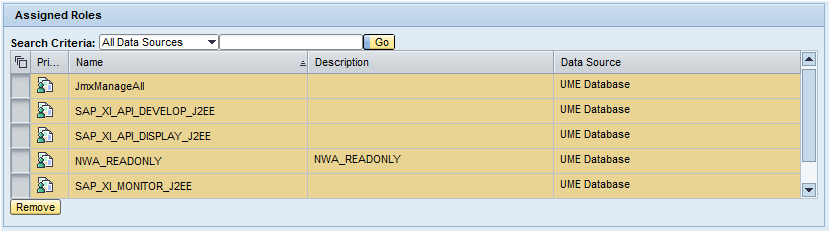
Add the following 5 roles to the user
NAME | DESCRIPTION | MANDATORY | RELATED MONITORING EXTRACTOR |
JmxManageAll | Required for PowerConnect to be able to query JMX | Yes | JMX |
SAP_XI_API_DEVELOP_J2EE | Required for PowerConnect to be able to retrieve PI Channel status | No | PI |
SAP_XI_API_DISPLAY_J2EE | Required for PowerConnect to be able to retrieve PI Channel status | No | PI |
NWA_READONLY | Required for PowerConnect to be able to retrieve PI message meta data | No | PI |
SAP_XI_MONITOR_J2EE | Required for PowerConnect to be able to retrieve PI message meta data | No | PI |
dbpool | Required for PowerConnect to be able to retrieve message server parameters and metrics | No | Message Server Parameters Message Server Metrics |
XiMdt.ExtendedMonitor | Required for PowerConnect to be able to retrieve PI message payload | No | PI |
bpm.solutionmanager | Required for PowerConnect to be able to monitor BPM Tasks | No | BPM |
locking | Required for PowerConnect to be able to monitor locks | No | Enqueue Server Locks |
keystore | Required for PowerConnect to be able to monitor certificates | No | Certificates (see KB here for further details on adding individual keystores) |
Applying permissions to the SAP PowerConnect Agent
Before a license can be applied the SAP PowerConnect Agent must be granted permissions to read the installation number of the SAP system.
Open a browser and navigate to the PowerConnect general page http://<serverhost>:<port>/webdynpro/resources/com.powerconnect5/spcj_wd/SapPowerConnectJava
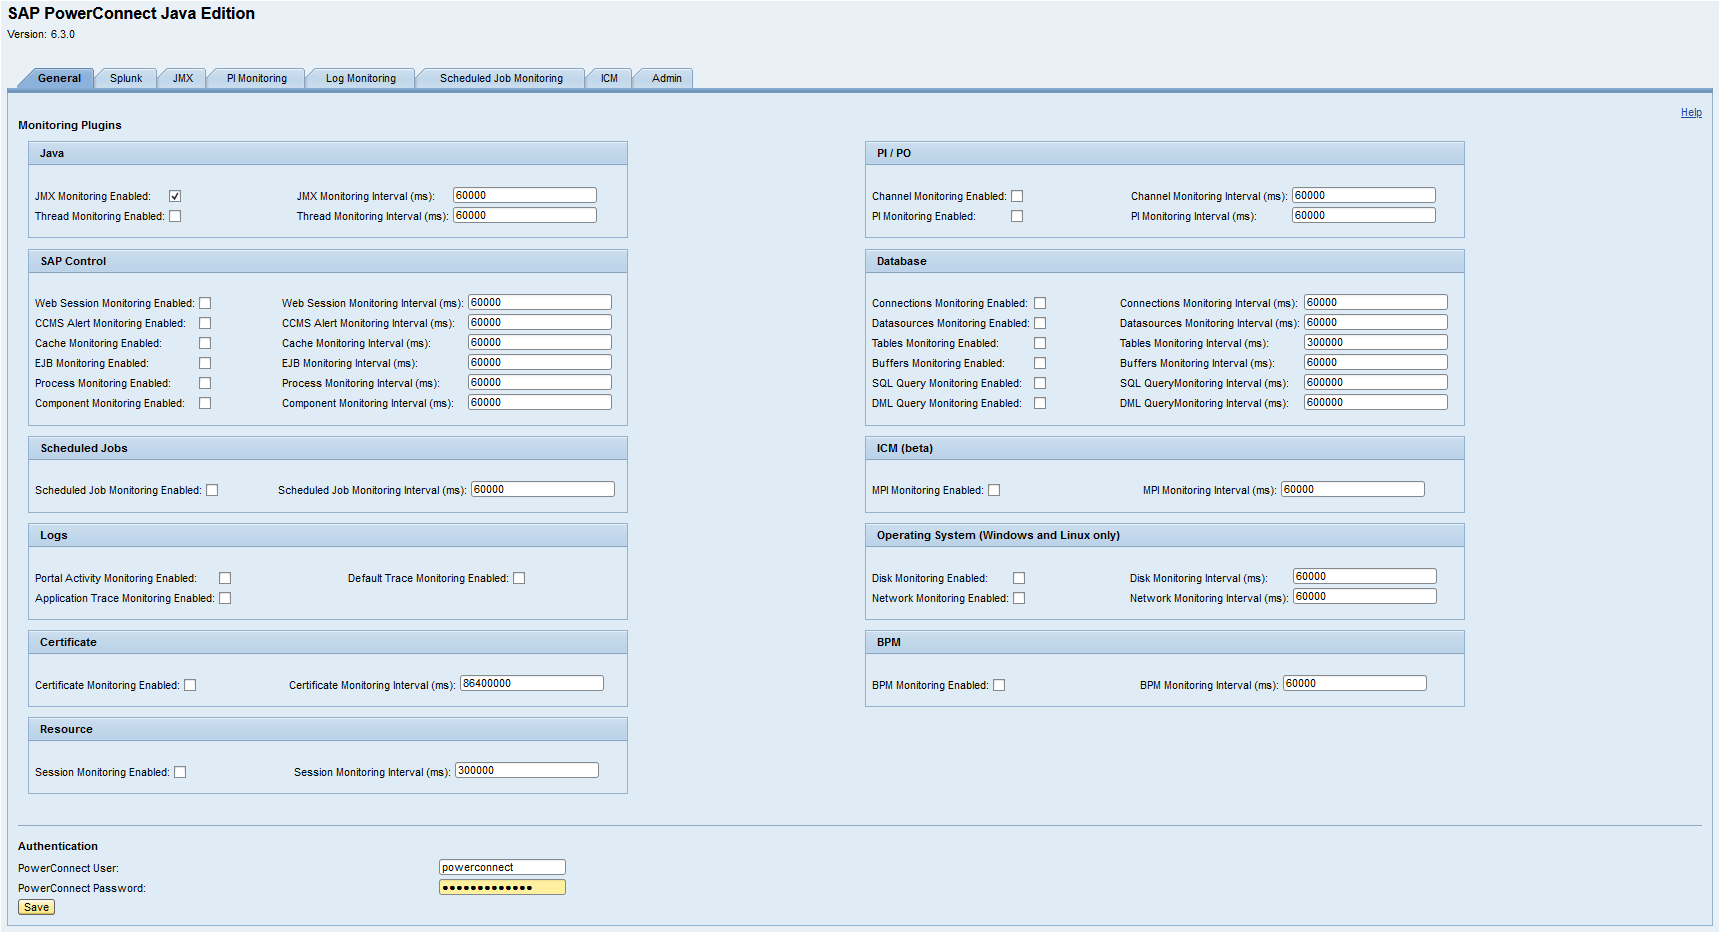
Enter the PowerConnect User and PowerConnect Password in the Authentication section and click Save
Now restart the SAP PowerConnect Agent using the instructions provided in Starting / Stopping Agent.
After successful restarting the agent the PowerConnect license must be applied to continue with basic configuration of PowerConnect.